Below are a few steps that can help you get into using Infomancer Forge. We hope these will help you get up to speed with the tool quickly.
Create a new project
When you start Infomancer Forge you will be presented with the following screen.
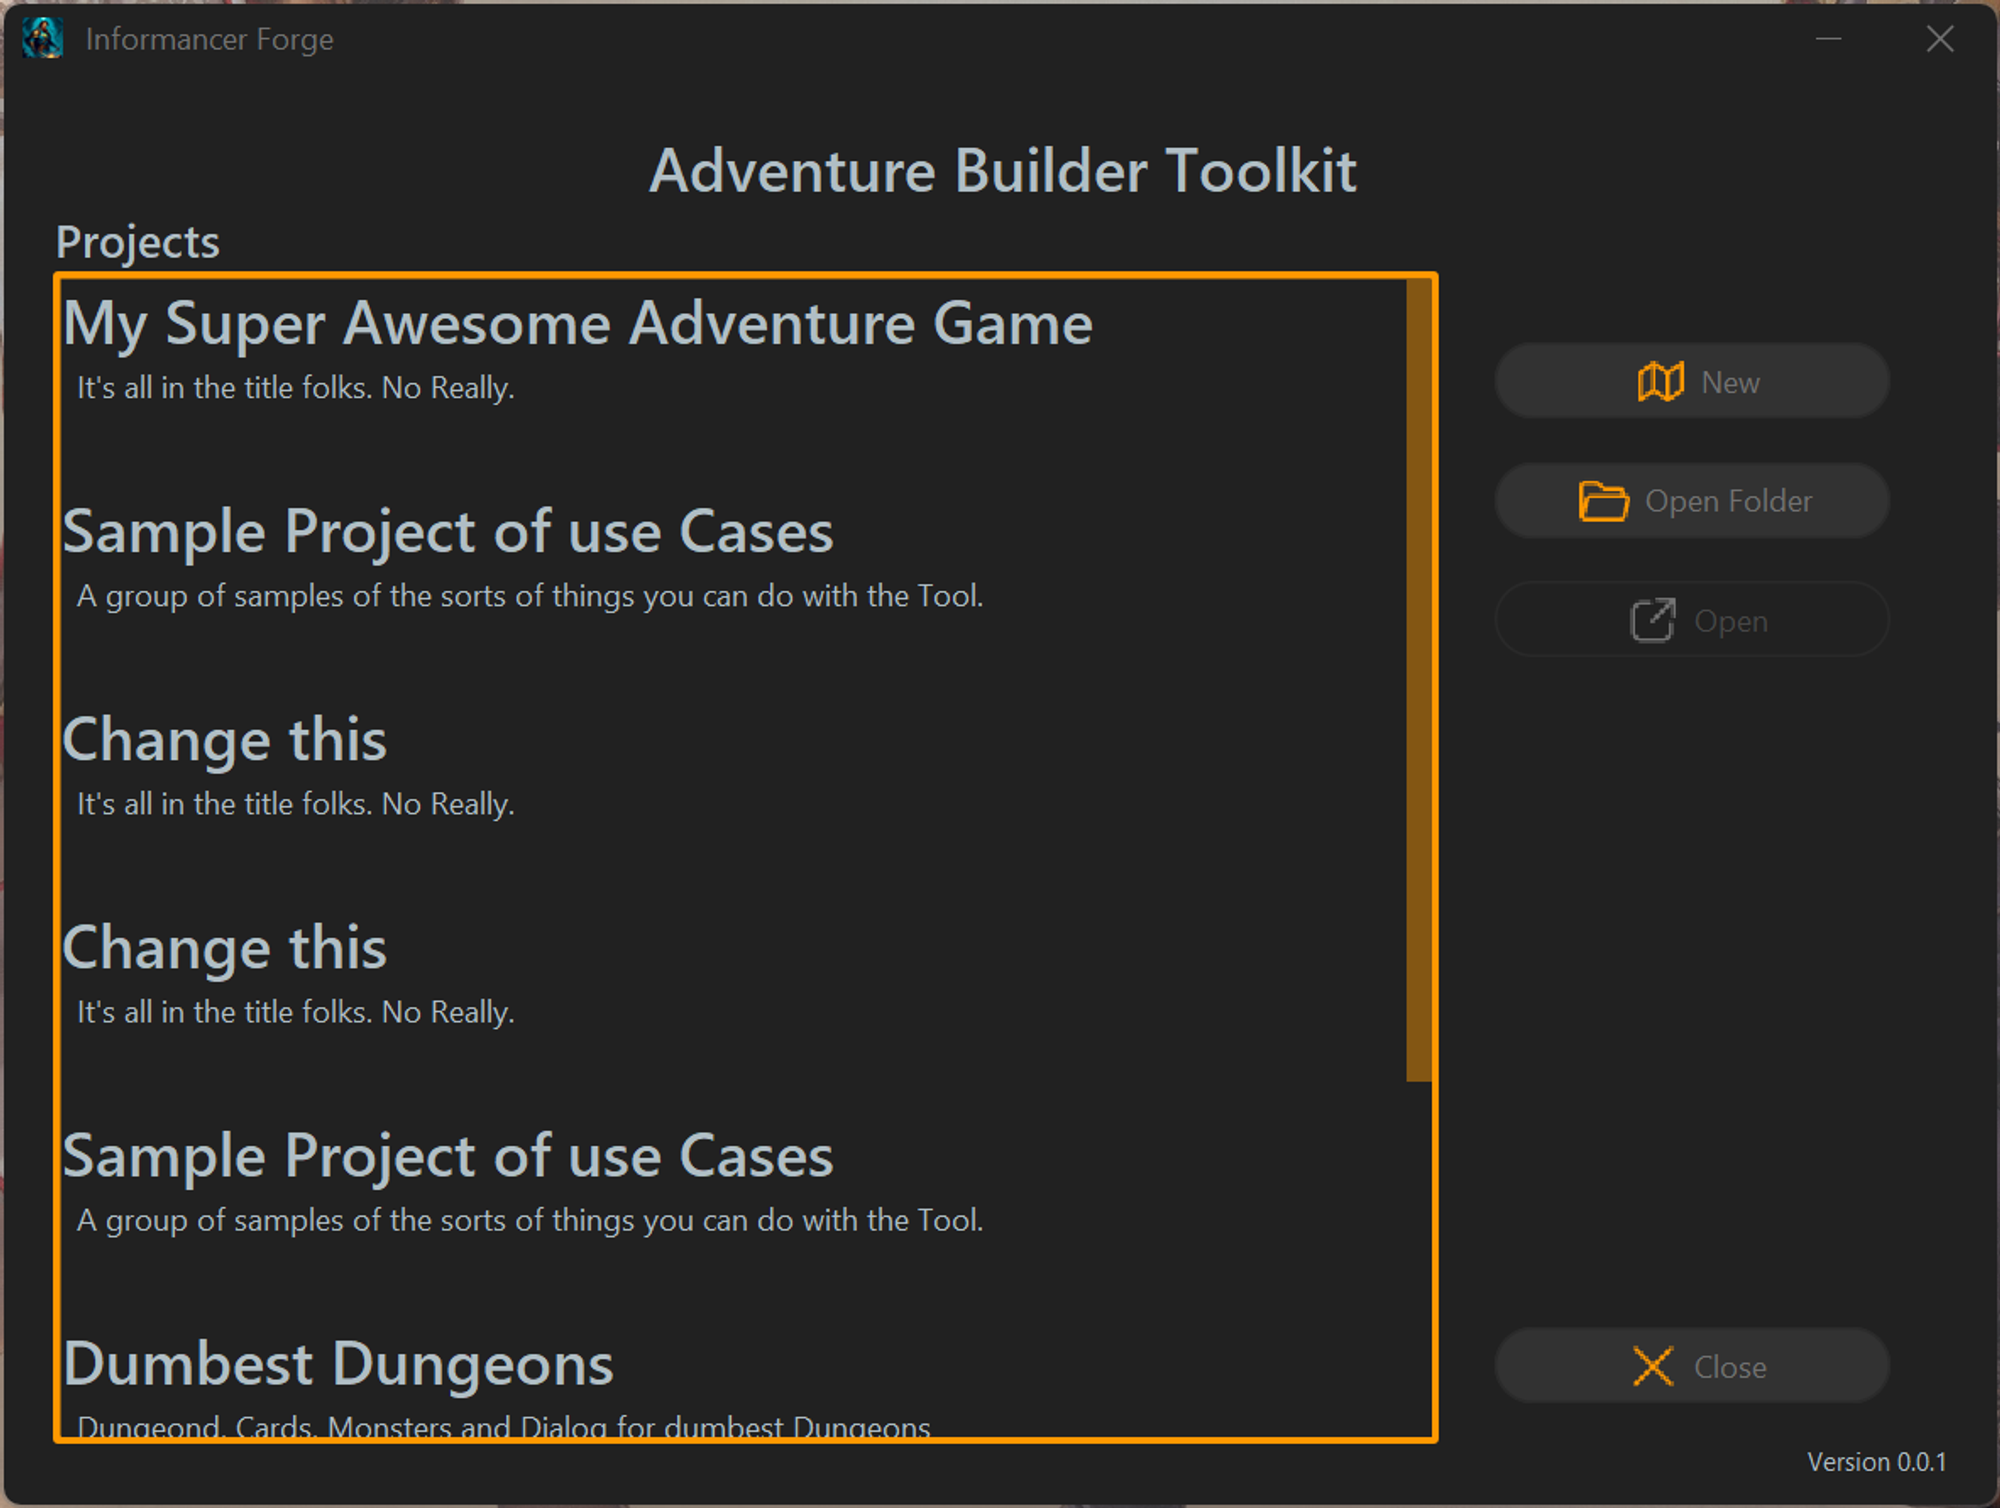
From here you can open a known project, opens a folder where a project has been saved previously or start a new project.
When you start a new project you will get the following wizard.
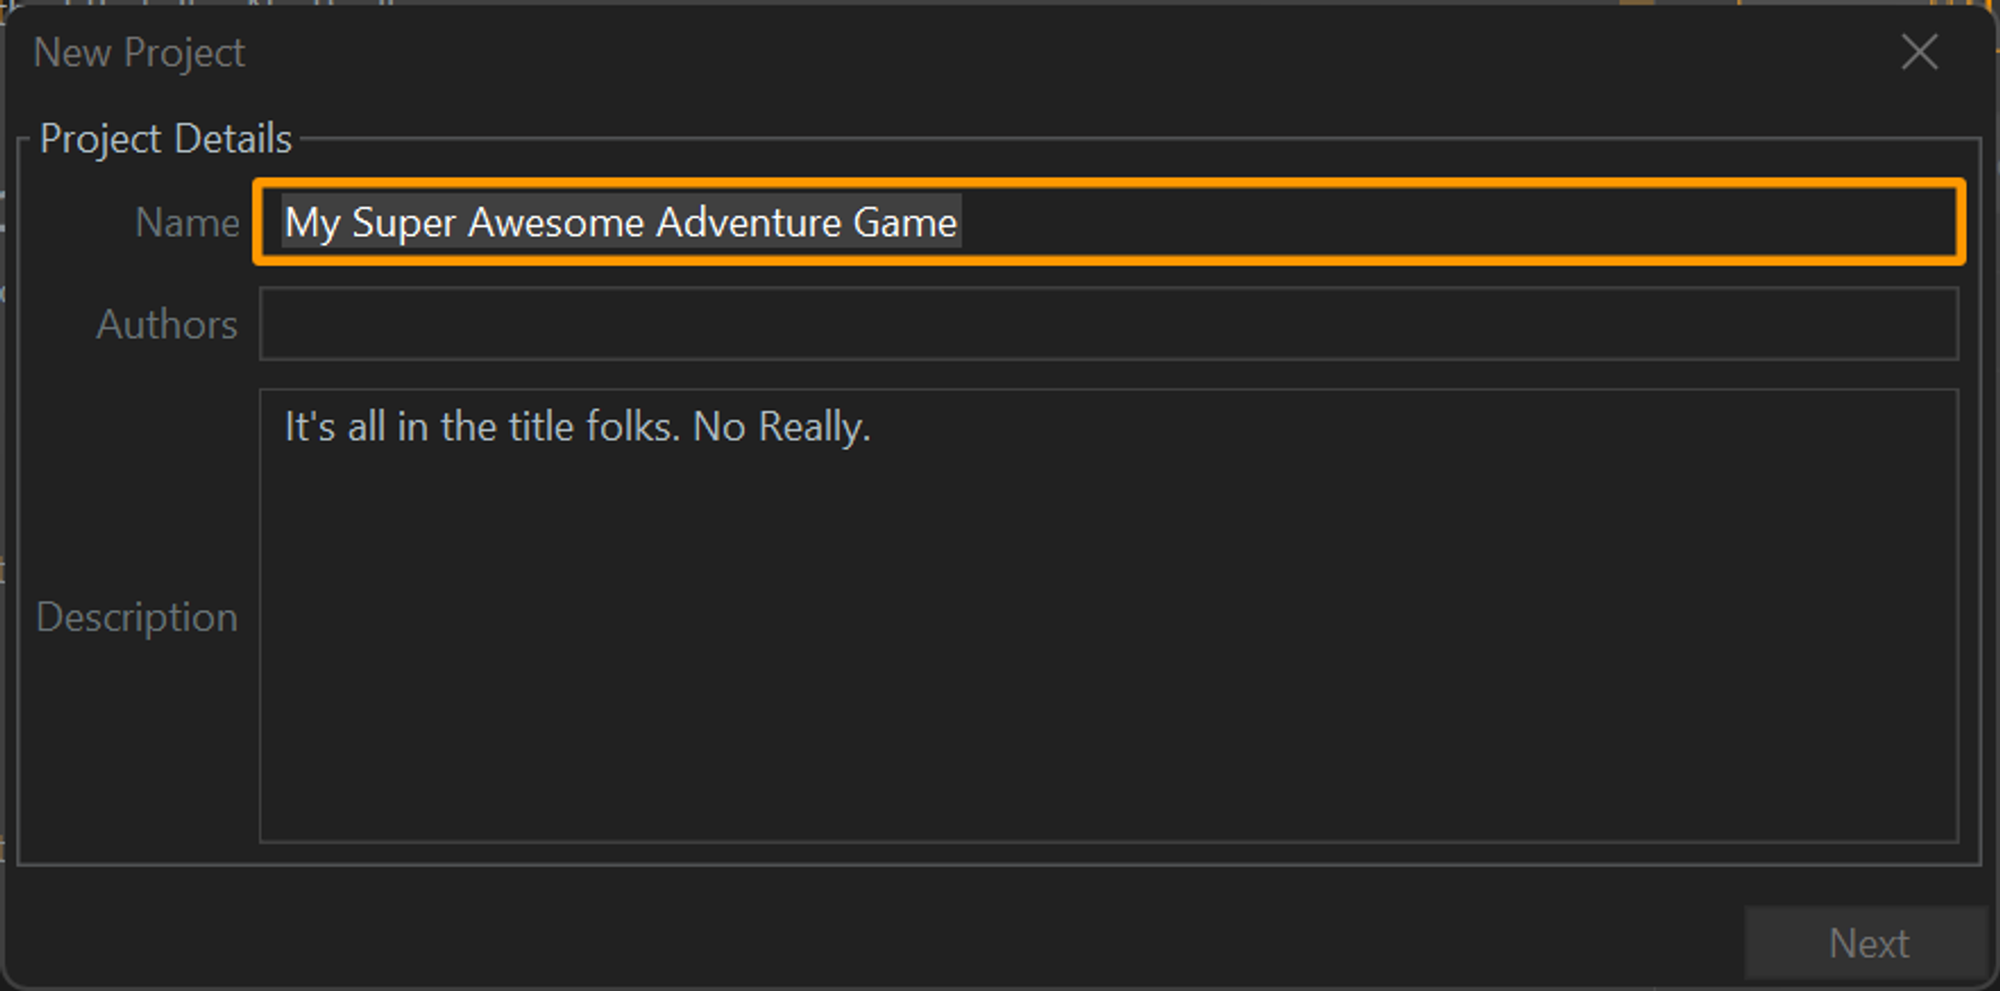
Here you need to name your project and give it a description and possibly add the Authors. None of this information matters beyond making it easier for you to identify the project for yourself.
You will also need to pick a Folder to save the project in. A project is a group of files and is identified by the project folder not by one specific file.
Once you have created the project you will have a screen that should look more or less like this.
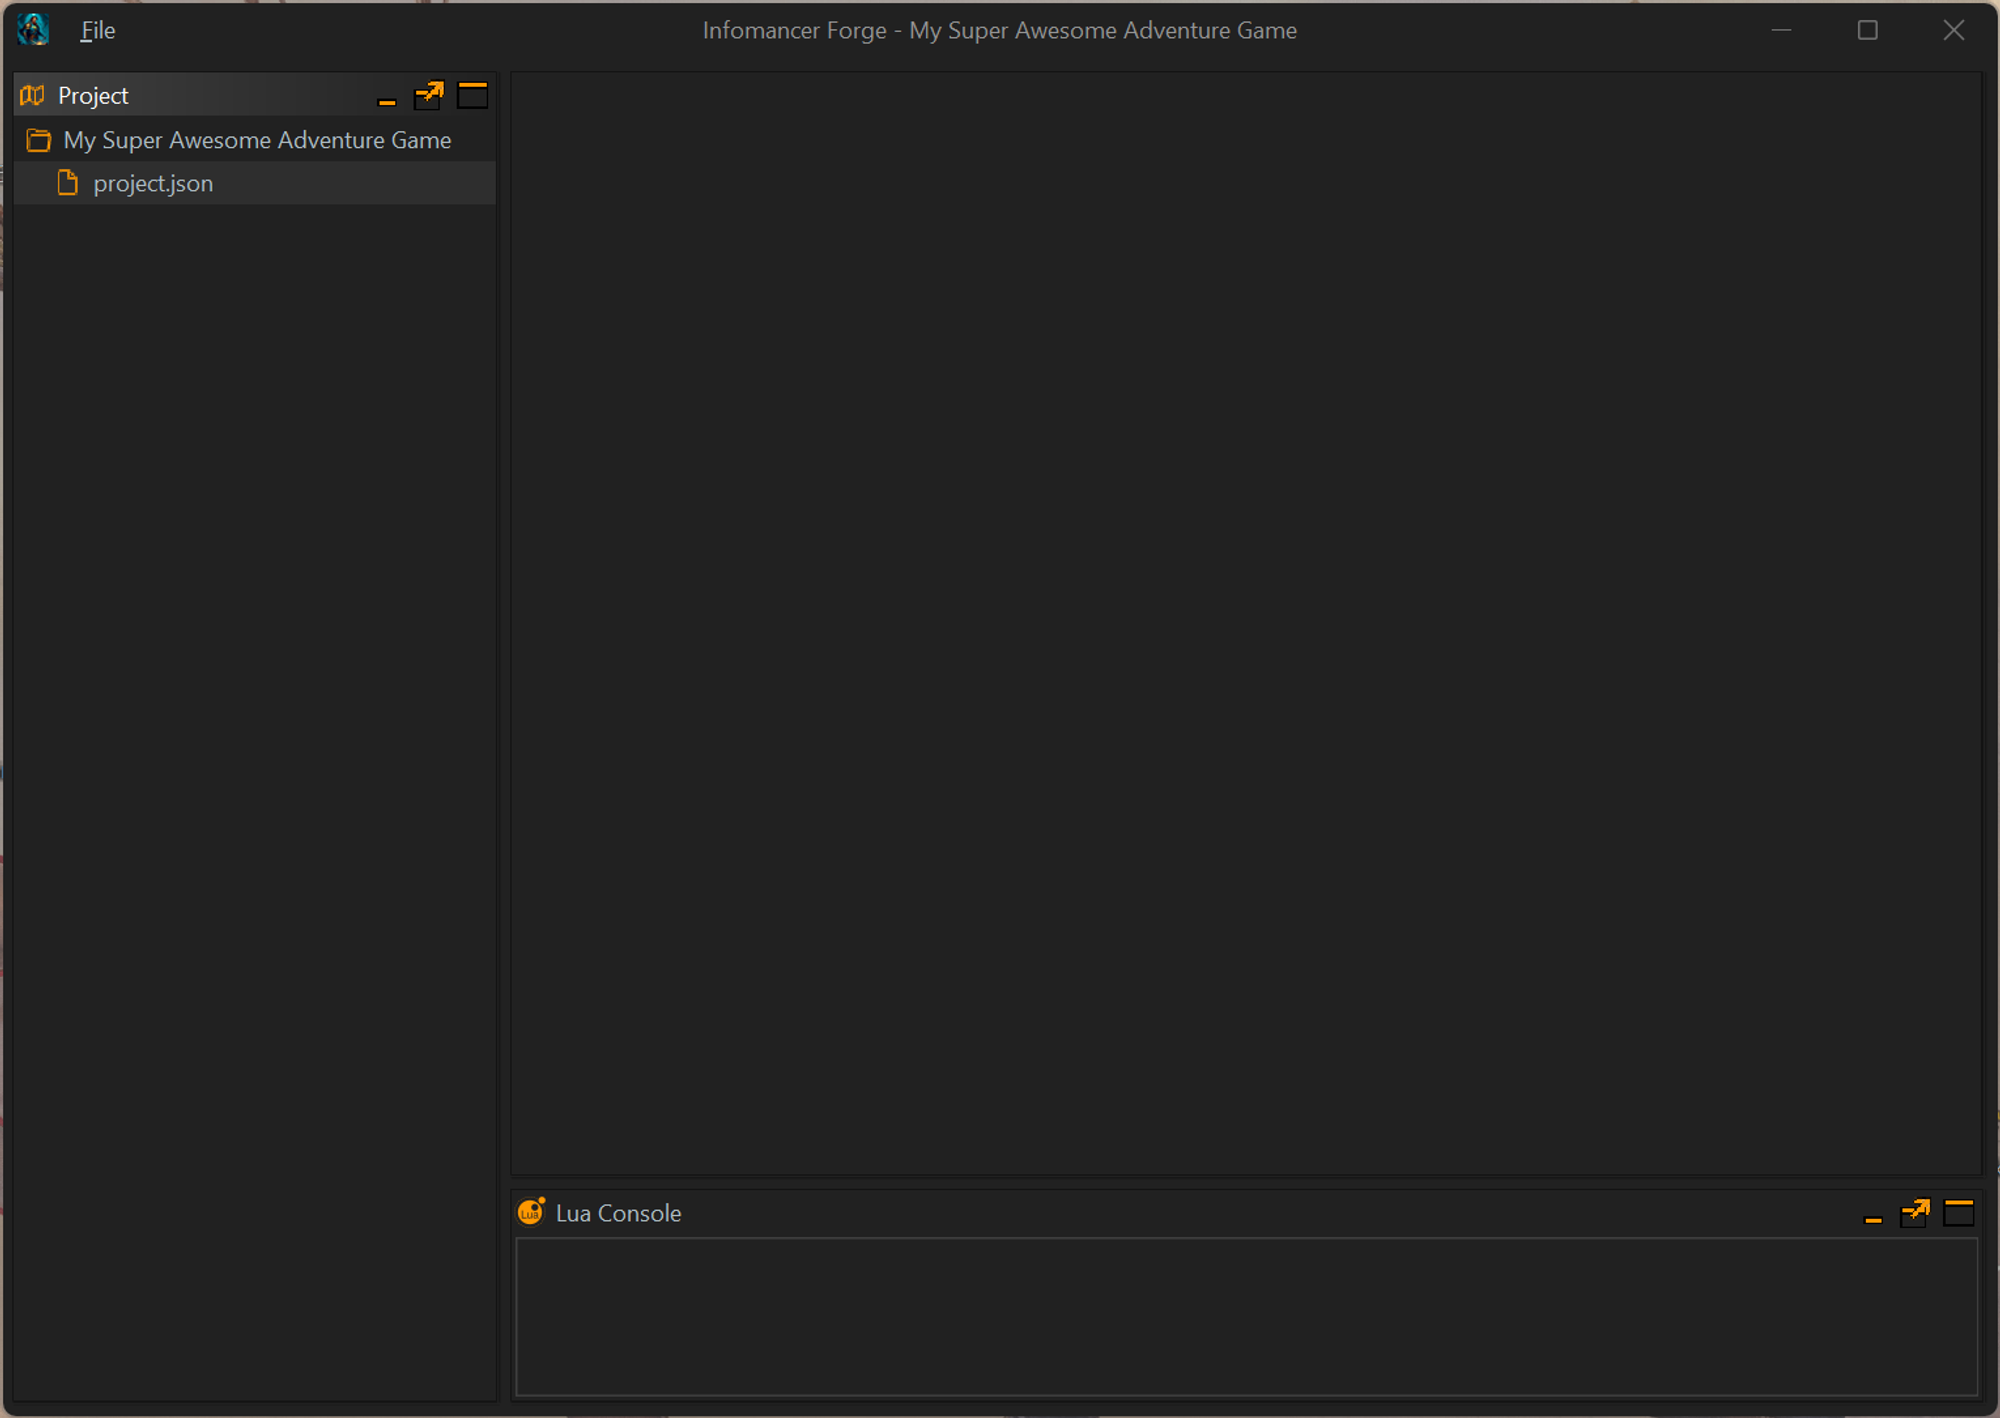
In the above screen there is a tree view of your projects files. The root is the folder and the
project.json is the basic meta data for your project. There will be some folders that are not shown here but are hidden. There are for the tool to use and should never require editing.To create a new Folder right click on the base project Folder you should see a menu like this.
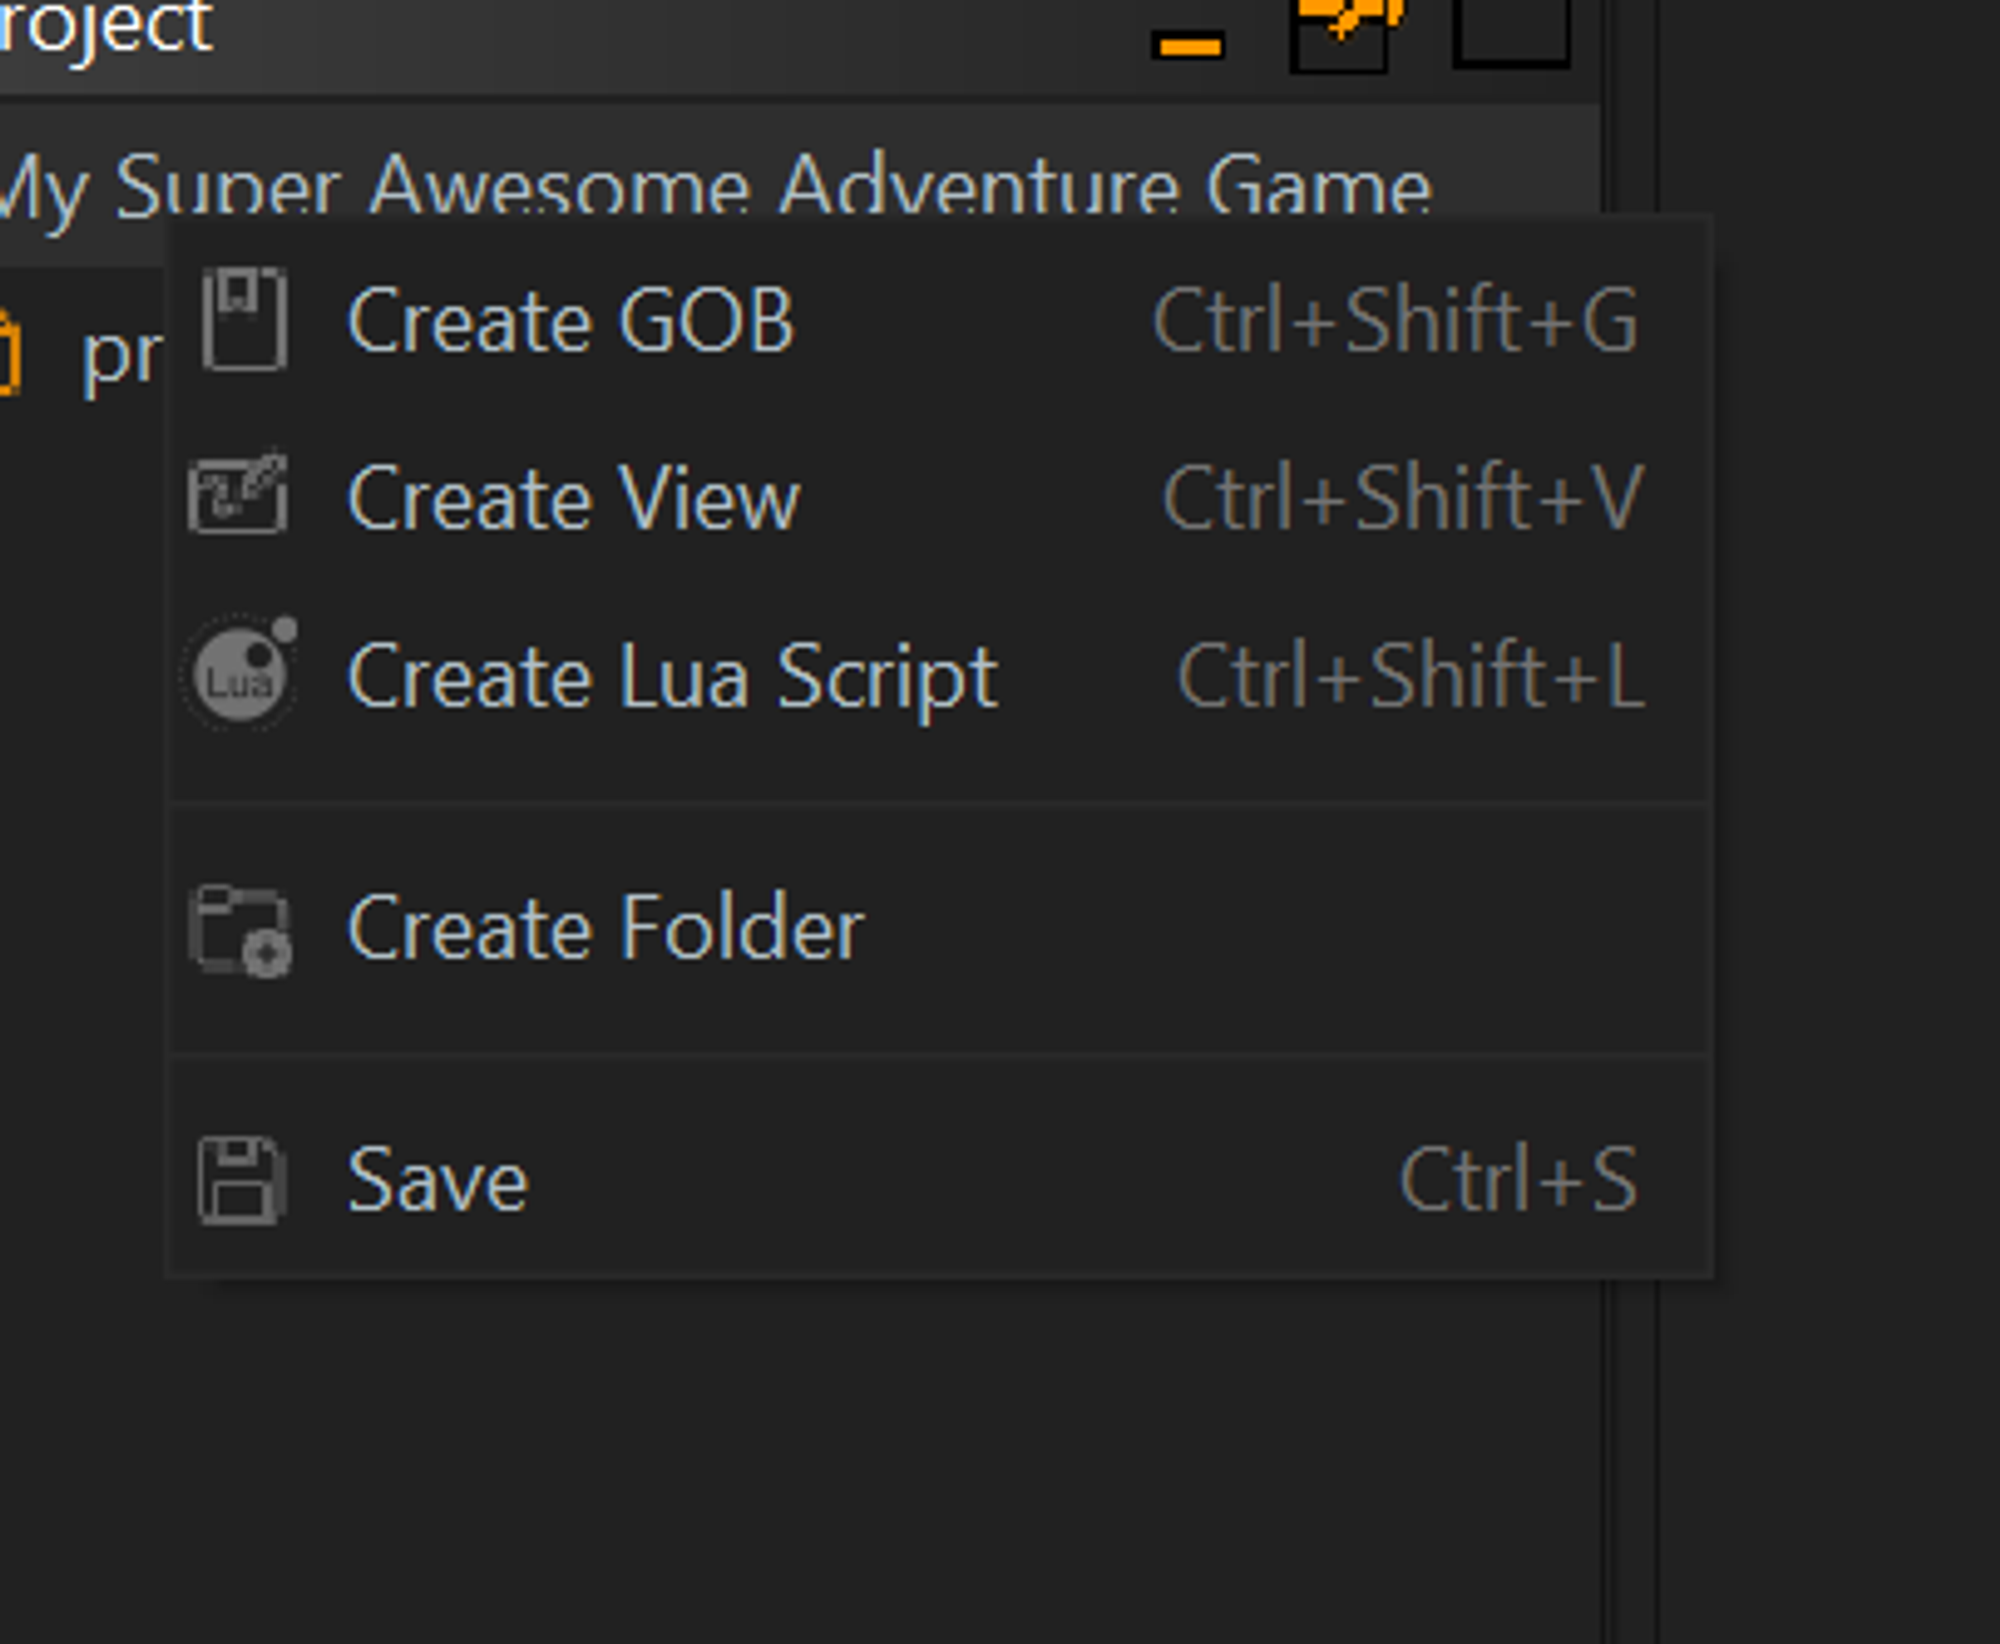
From here you can create new folders, GOB’s Views and Scripts. I will create a Folder for some Monster GOBS. Once done the Project Tree looks like this

We can now right click in Monsters to Create additional folders, GOB’s and Views.
Creating GOBs
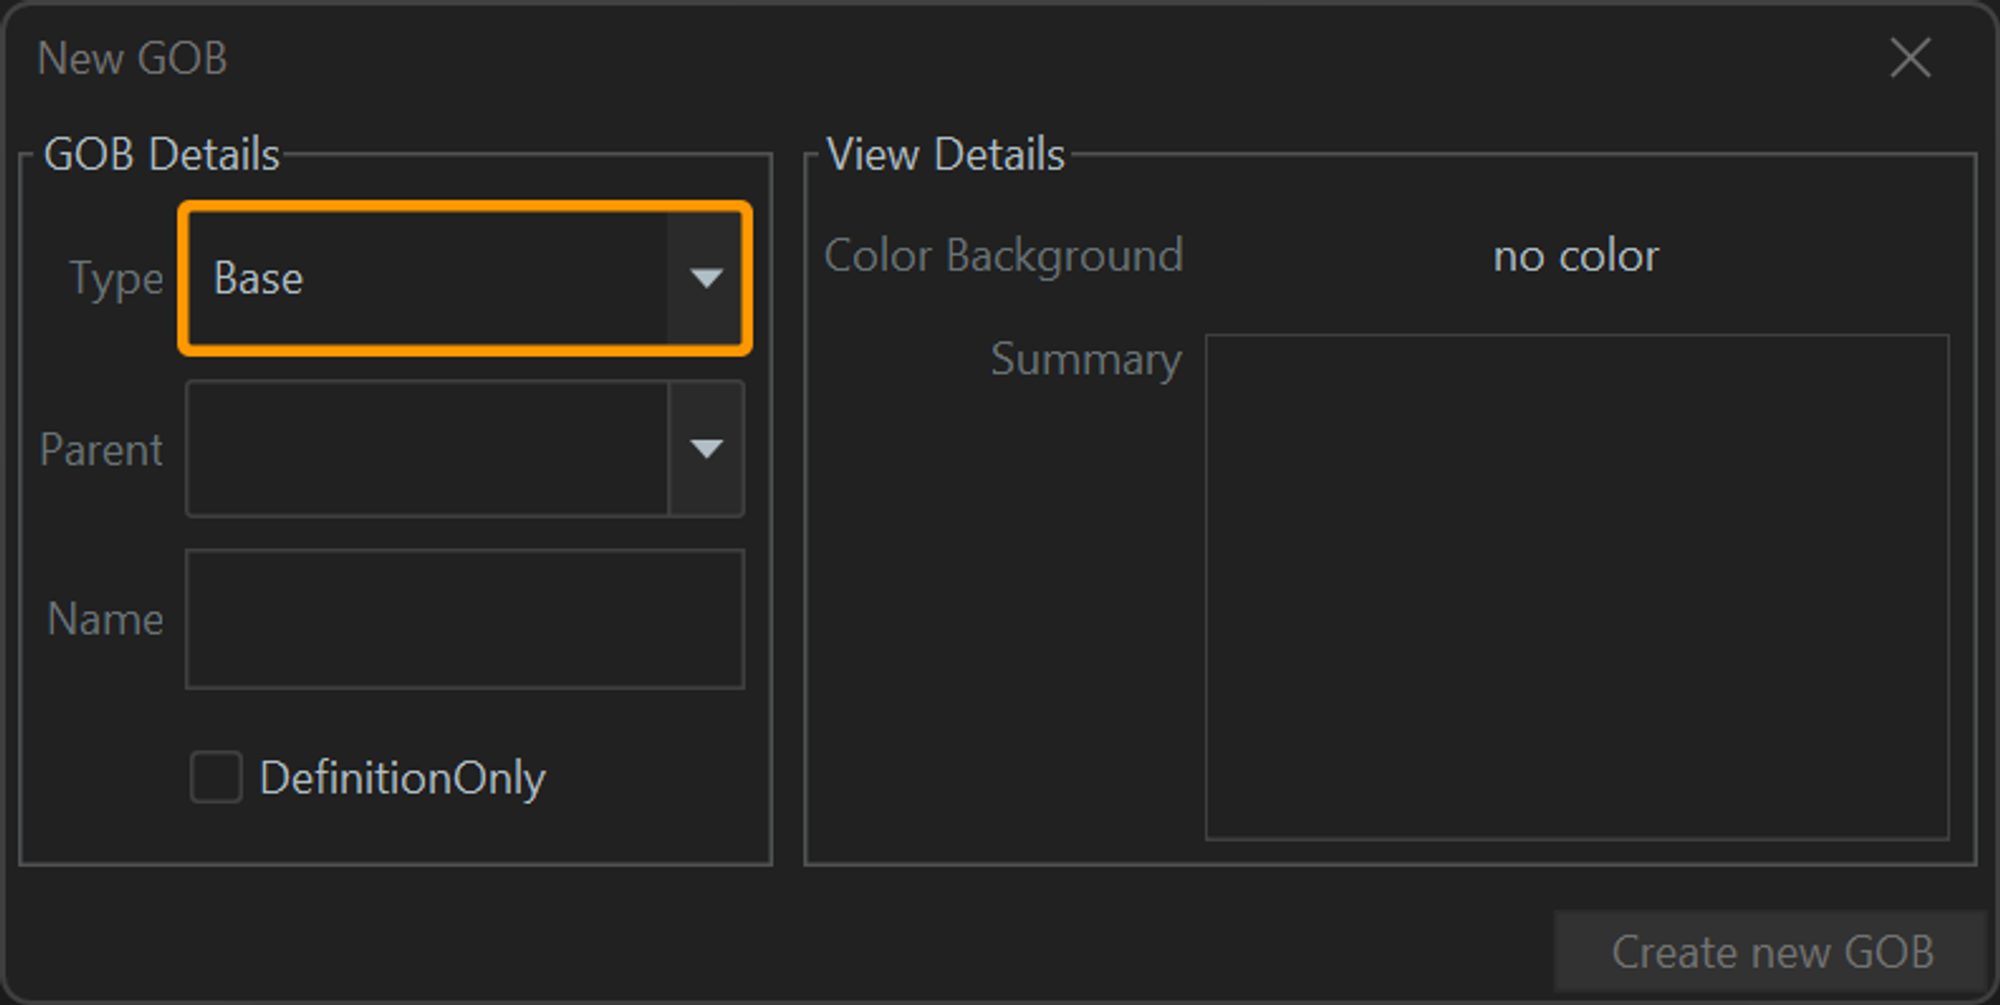
When you select create GOB you will be presented with the follow Wizard screen.
Fields and meanings
Type | There are currently Two Types Base and Embedded. The distinction is that Base GOB’s will have a unique name and can be referenced by them in your application. Embedded are pieces of Data that can only exist as Parts of another GOB. We will cover this in more Details in the GOB’s section. |
Parent | If this GOB inherits properties from another you give it the parent here. For those of you with OO experience you would know this as Inheritance. This can be useful for items like Inventory that may share a lot of common data but various types of objects would need more fields to describe them. |
Name | This is the name you use to identify this GOB. This would be something Like “Monster” not a specific monster. A GOB is the category not the instances of data in that category. |
Definition Only | For some GOB types we might never want to capture data for them they only server as a base for others to expand from. If you select this option you will never be able to create instance of this GOB only inherit from it with others definitions. |
Color Background | When GOB’s are shown in View’s they have a background color. This is where you choose that. This can assist in seeing your data and having a clear understanding of what each item is. This color is universal for al instances of this GOB in any view. |
Summary | This is where you can write a summary for the GOB. You can embed data from the gob into the summary more will be expanded on in the GOB section as it’s a log to cover here. |
For this Tutorial we have created a Monster GOB as shown below.

Designing the GOB
Once we have created our GOB we can double click on it in the view and it will open as below.
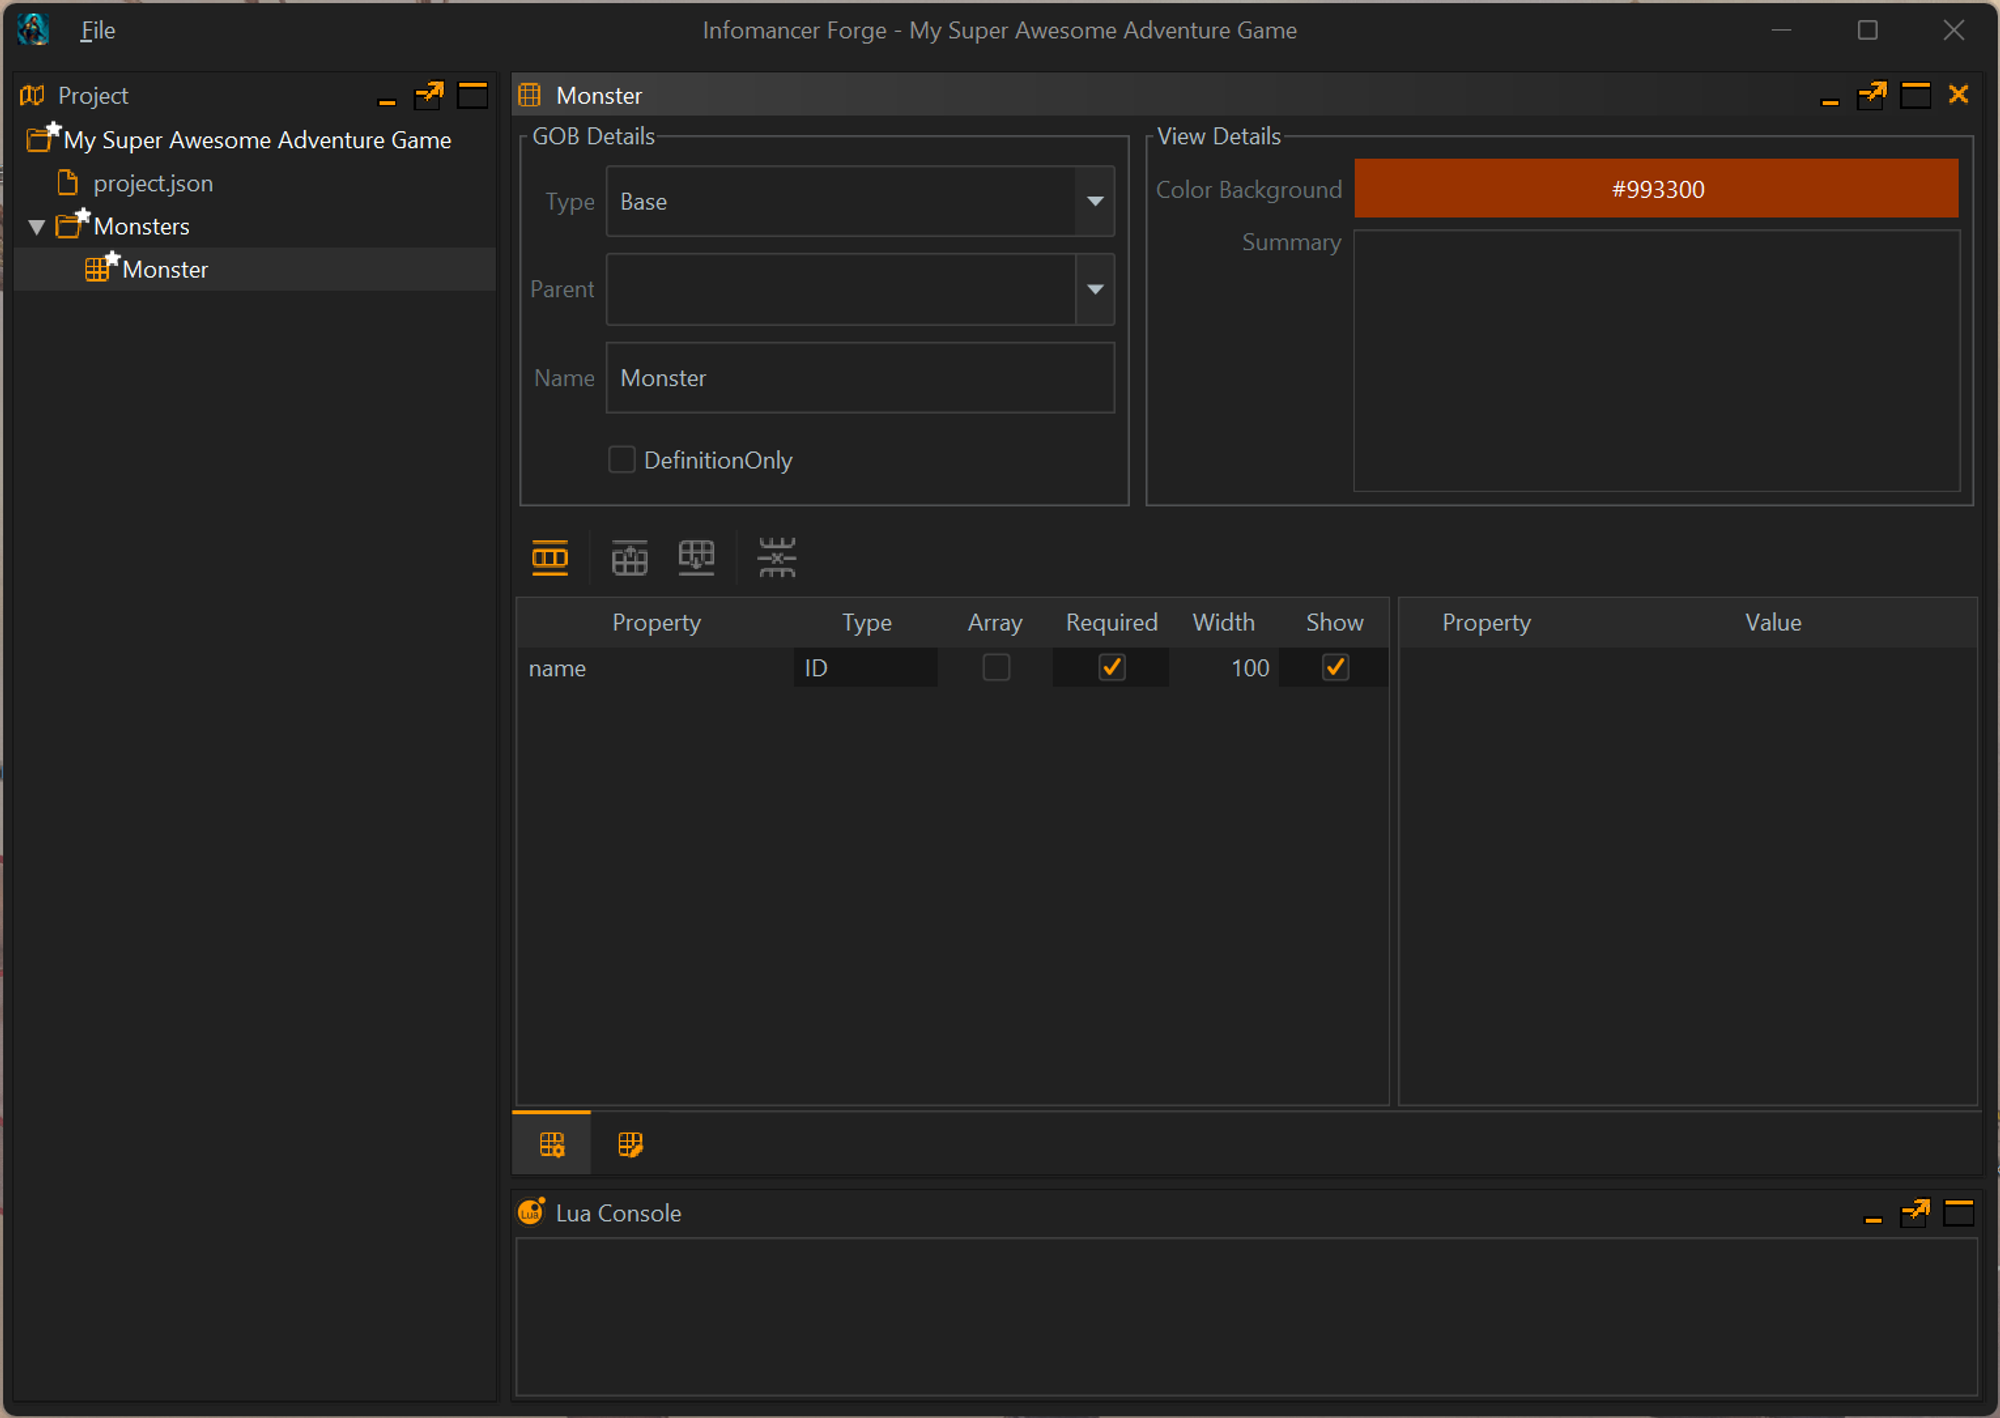
As you can see the definition data we set when in the Wizard is at the top under that is a list of properties.
Because this is a Base GOB it will always have one ID type field. This is it’s name in the system. You can change the ID fields name from name to anything you like but you will require one ID field and no more in the GOB.
We can now add fields by clicking the add field button

I have added 4 new fields to show what they look like.
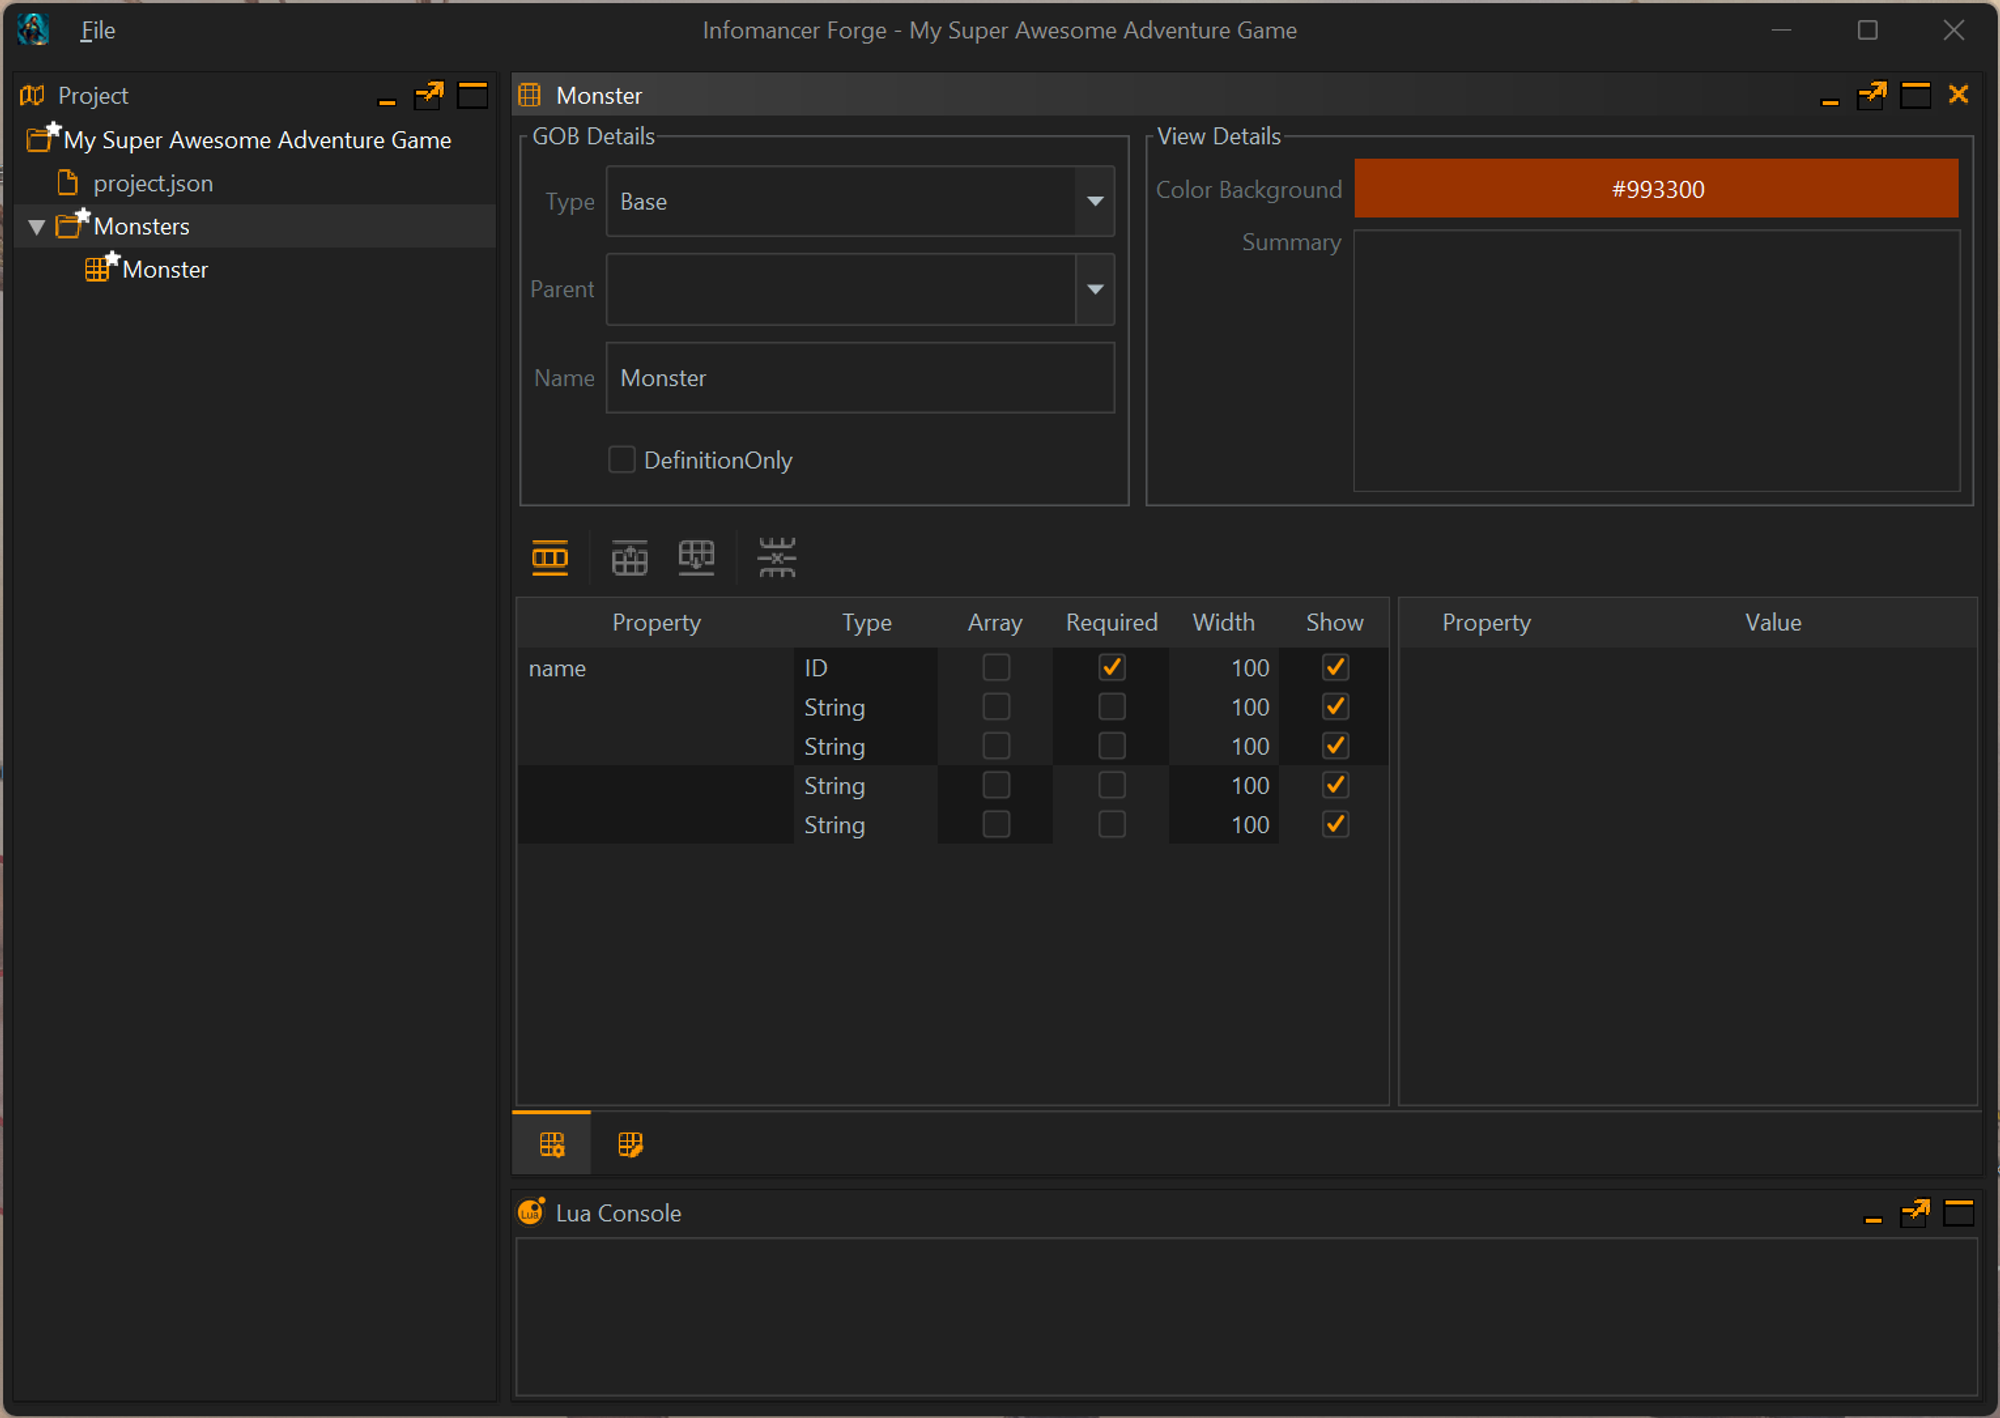
We can then give each a name, Type if it’s an array required and how much width we want it to take up when we are viewing it in a list view.
The following types are currently supported
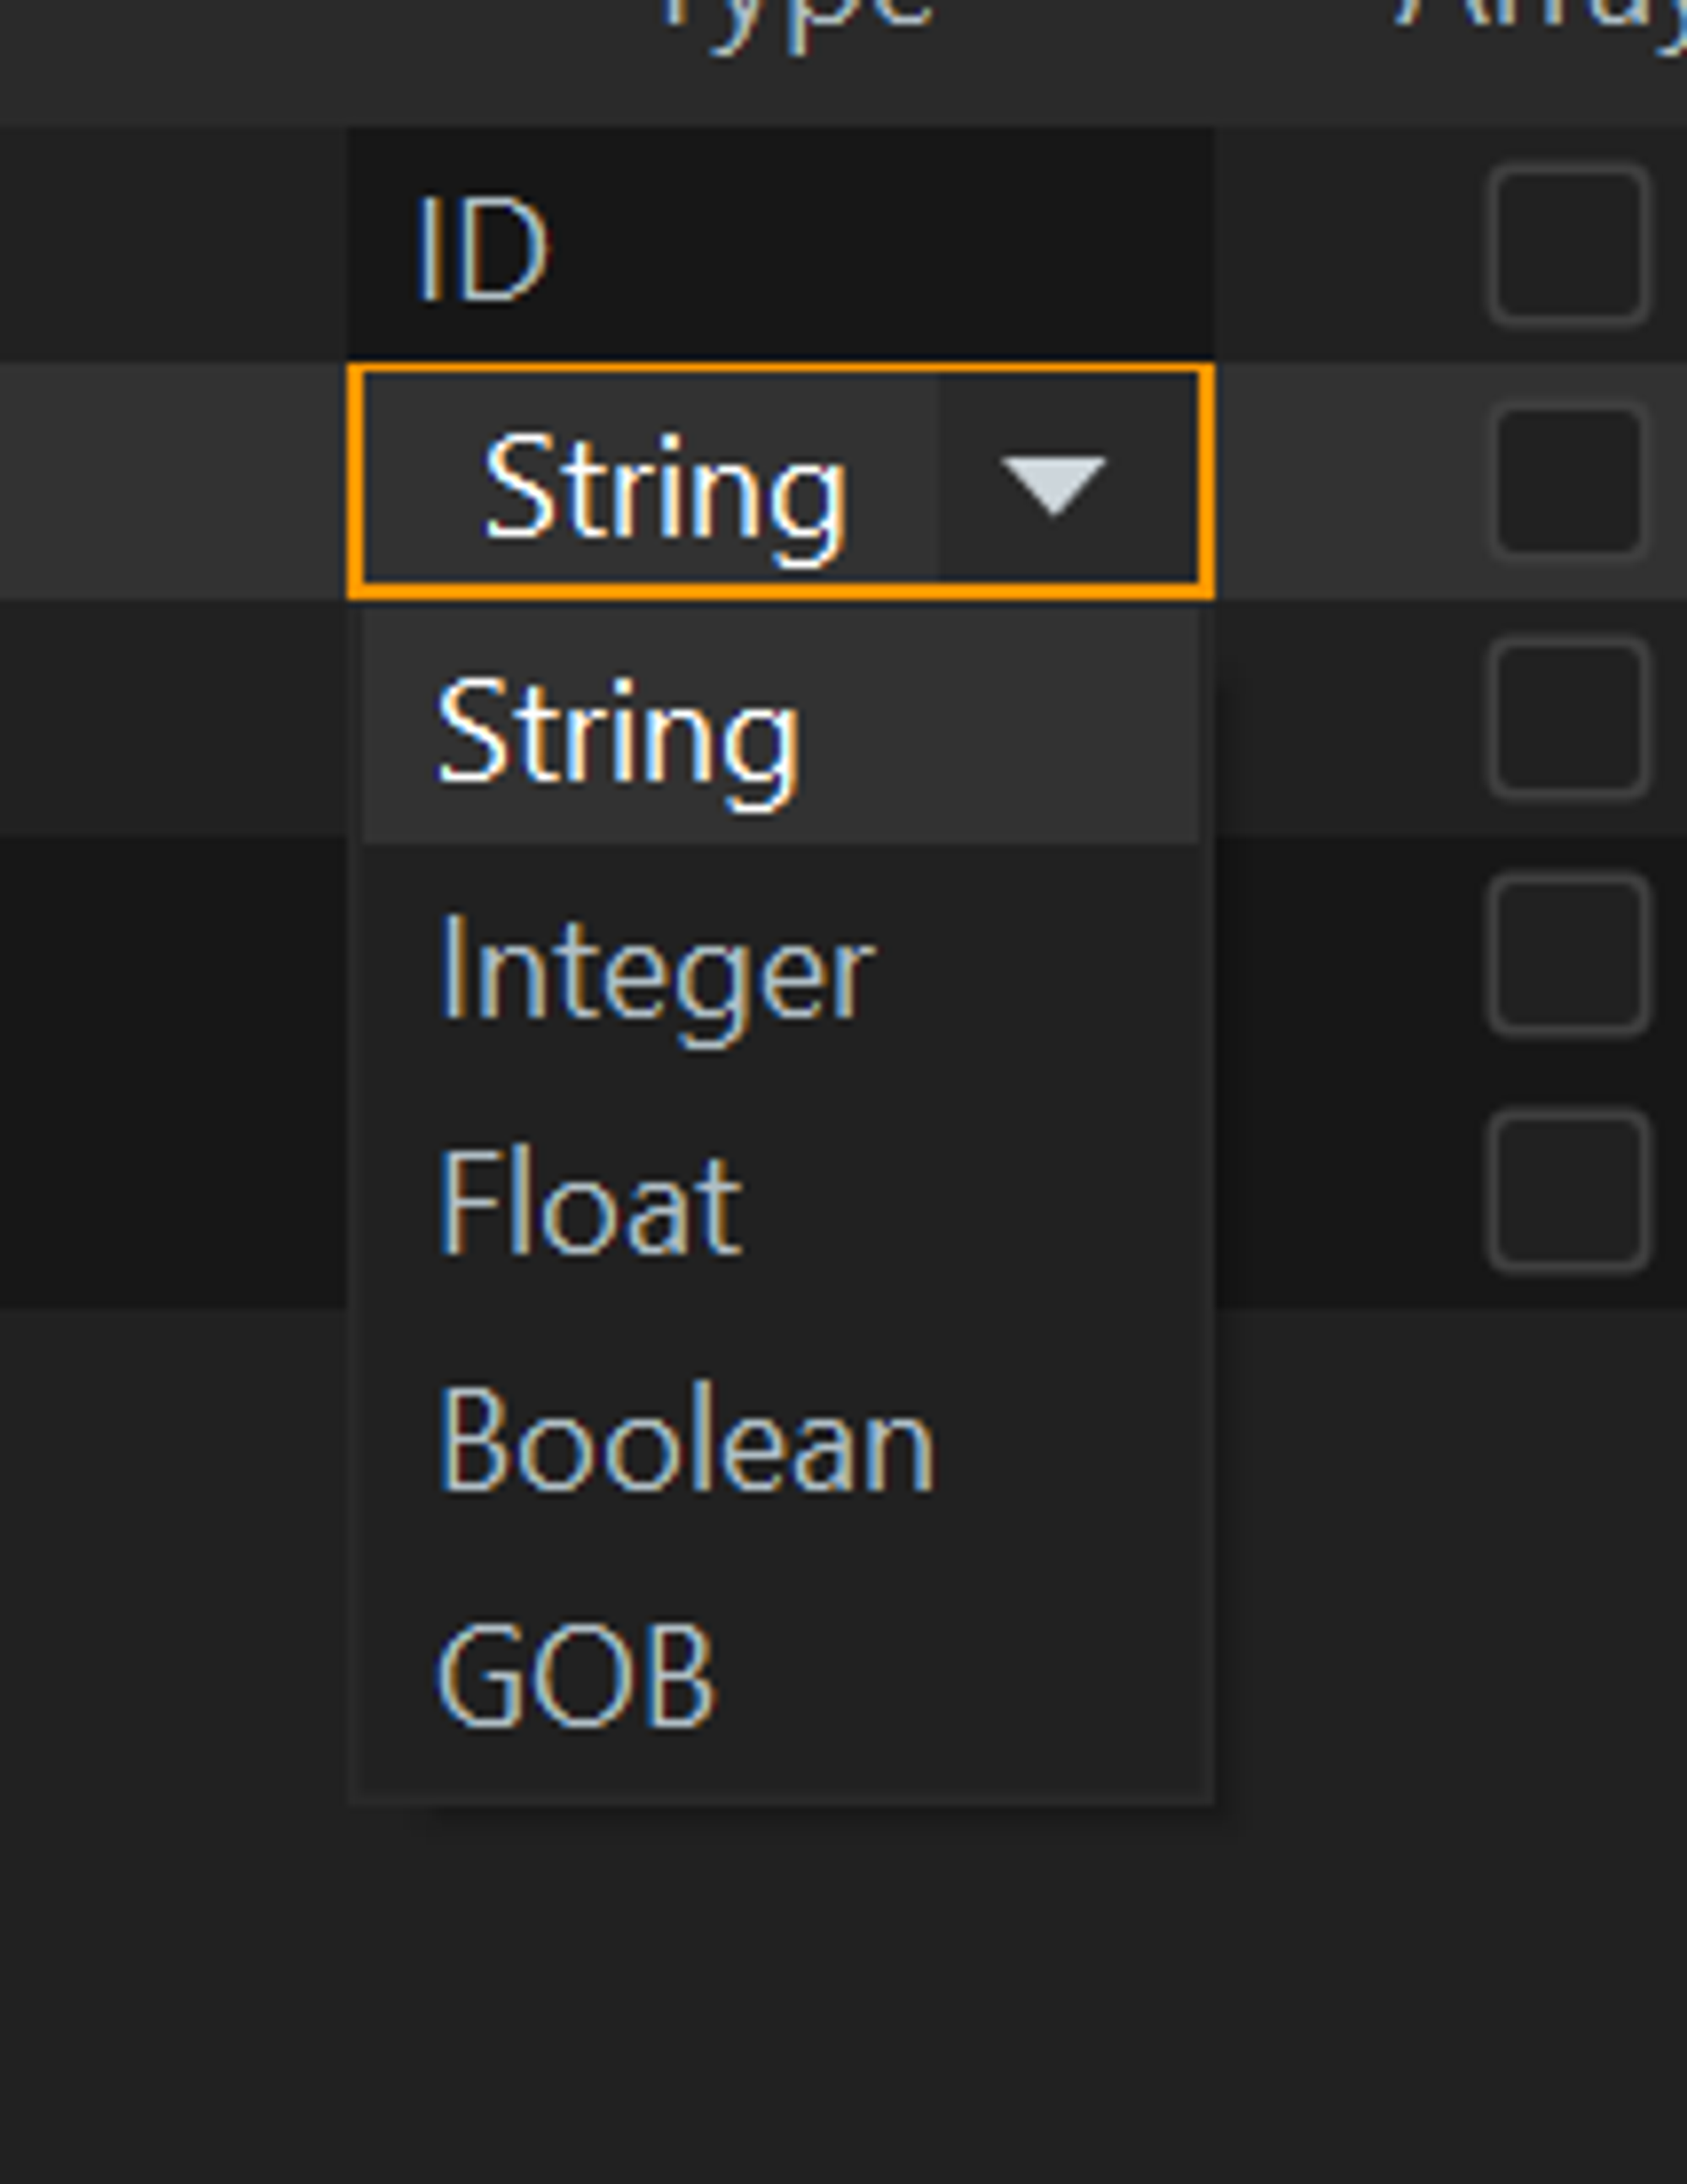
It’s not obvious immediately but the one type missing here is Option. That because that can be better achieved with a GOB. So for example if you want a monster to have an attack type such as Range, Melee or even more specific things you would create a GOB for those and then link it here.
Some of these options Like array do not function as well as we would like yet. There is a lot of work to do to make them easier to edit in list views and in Views.
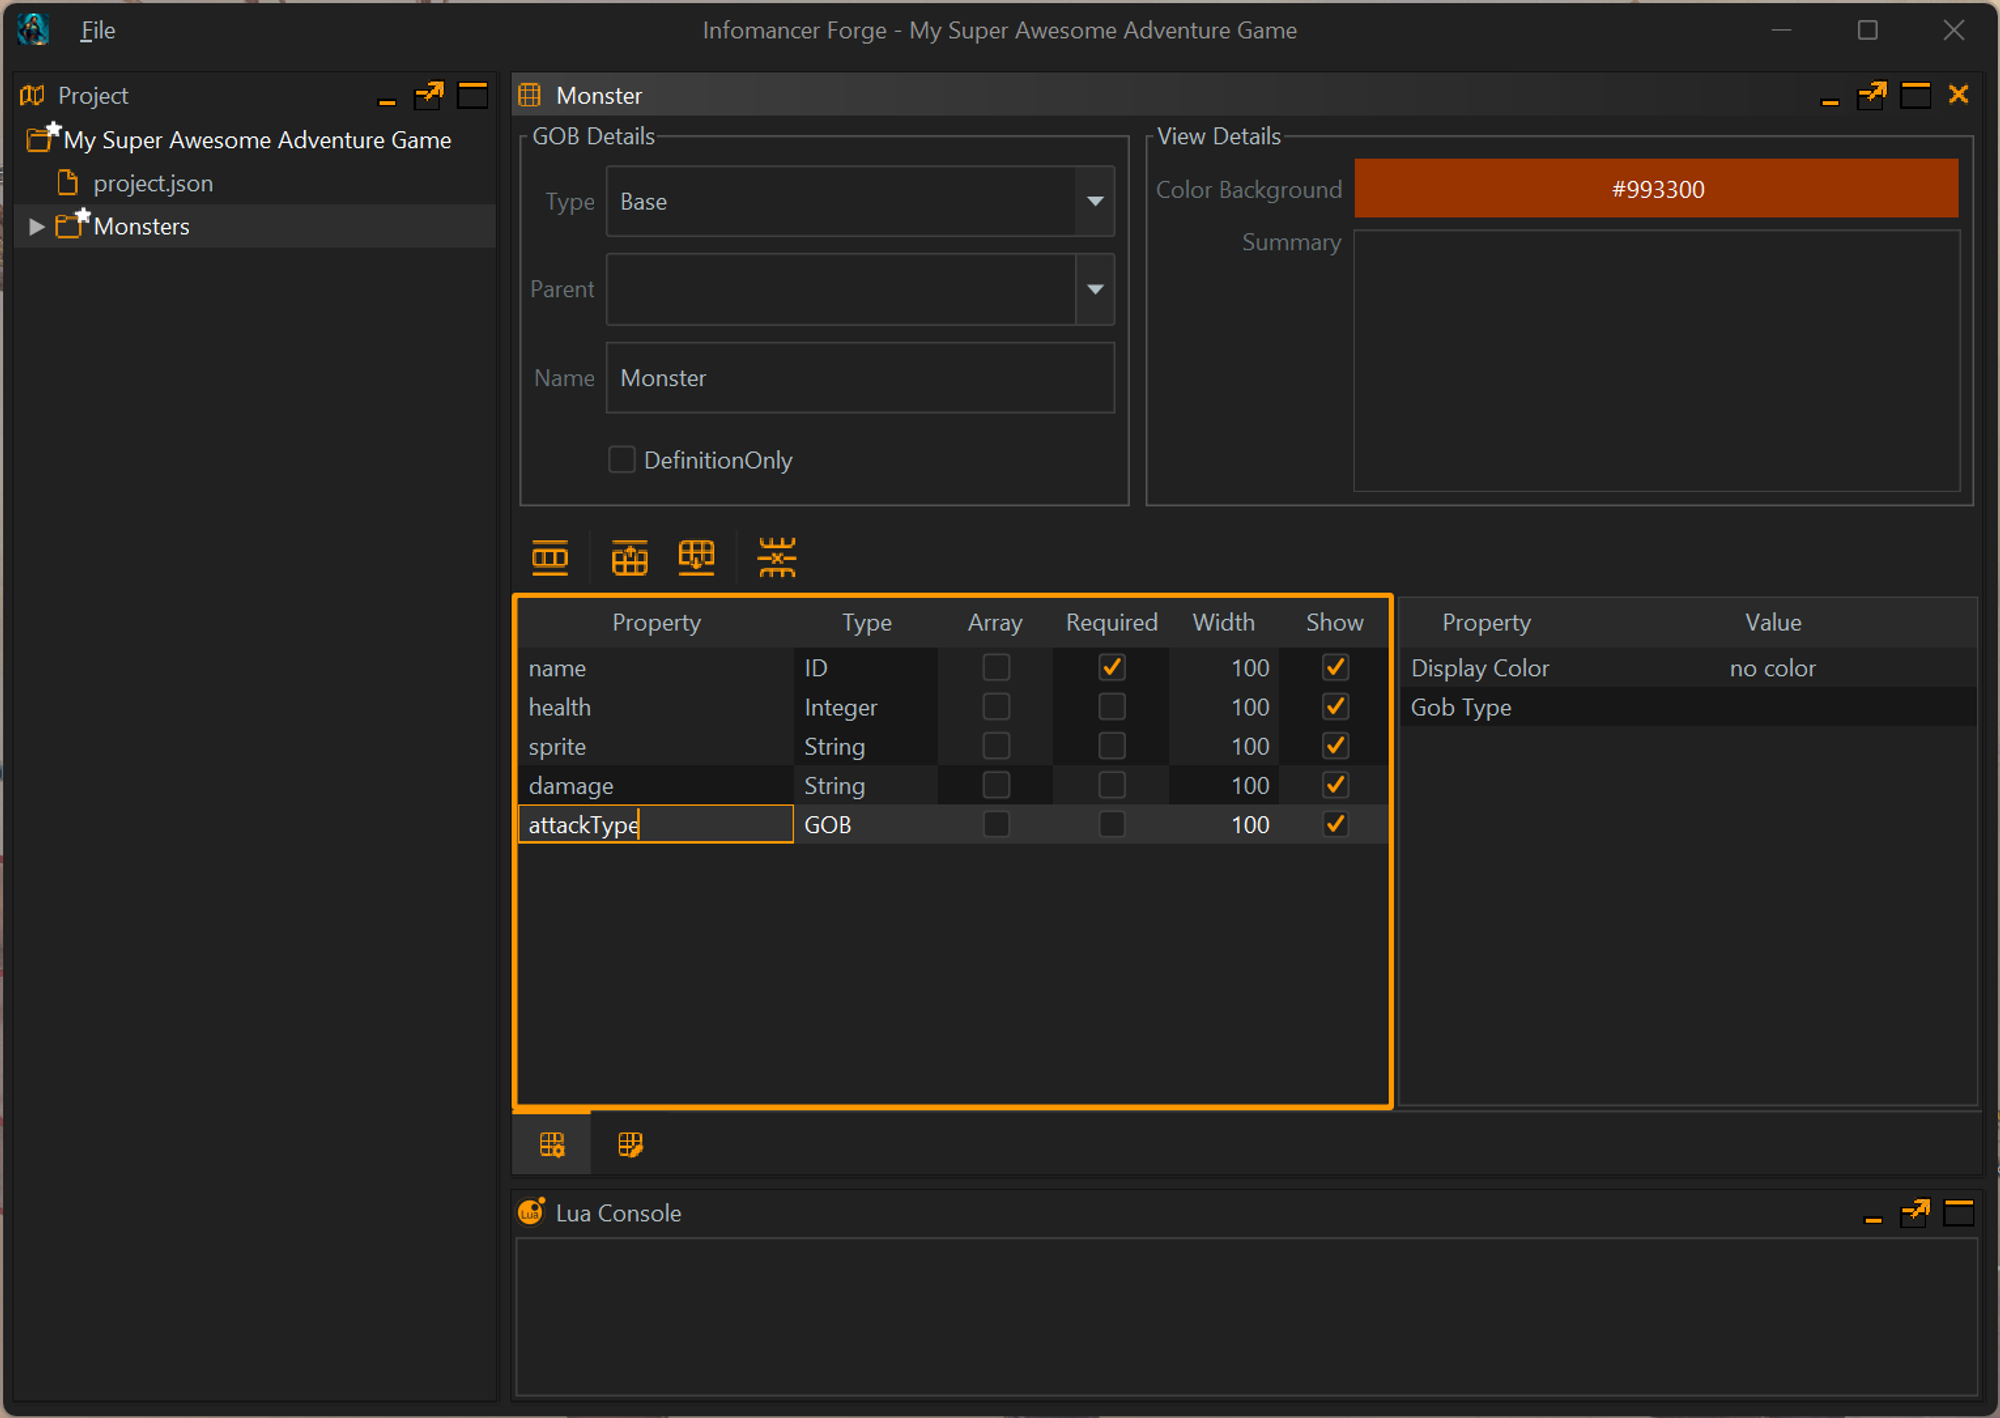
As you can see I have added a few basic fields I would expect to need including AttackType that I can not currently link. I will add that as a GOB and then select it here.
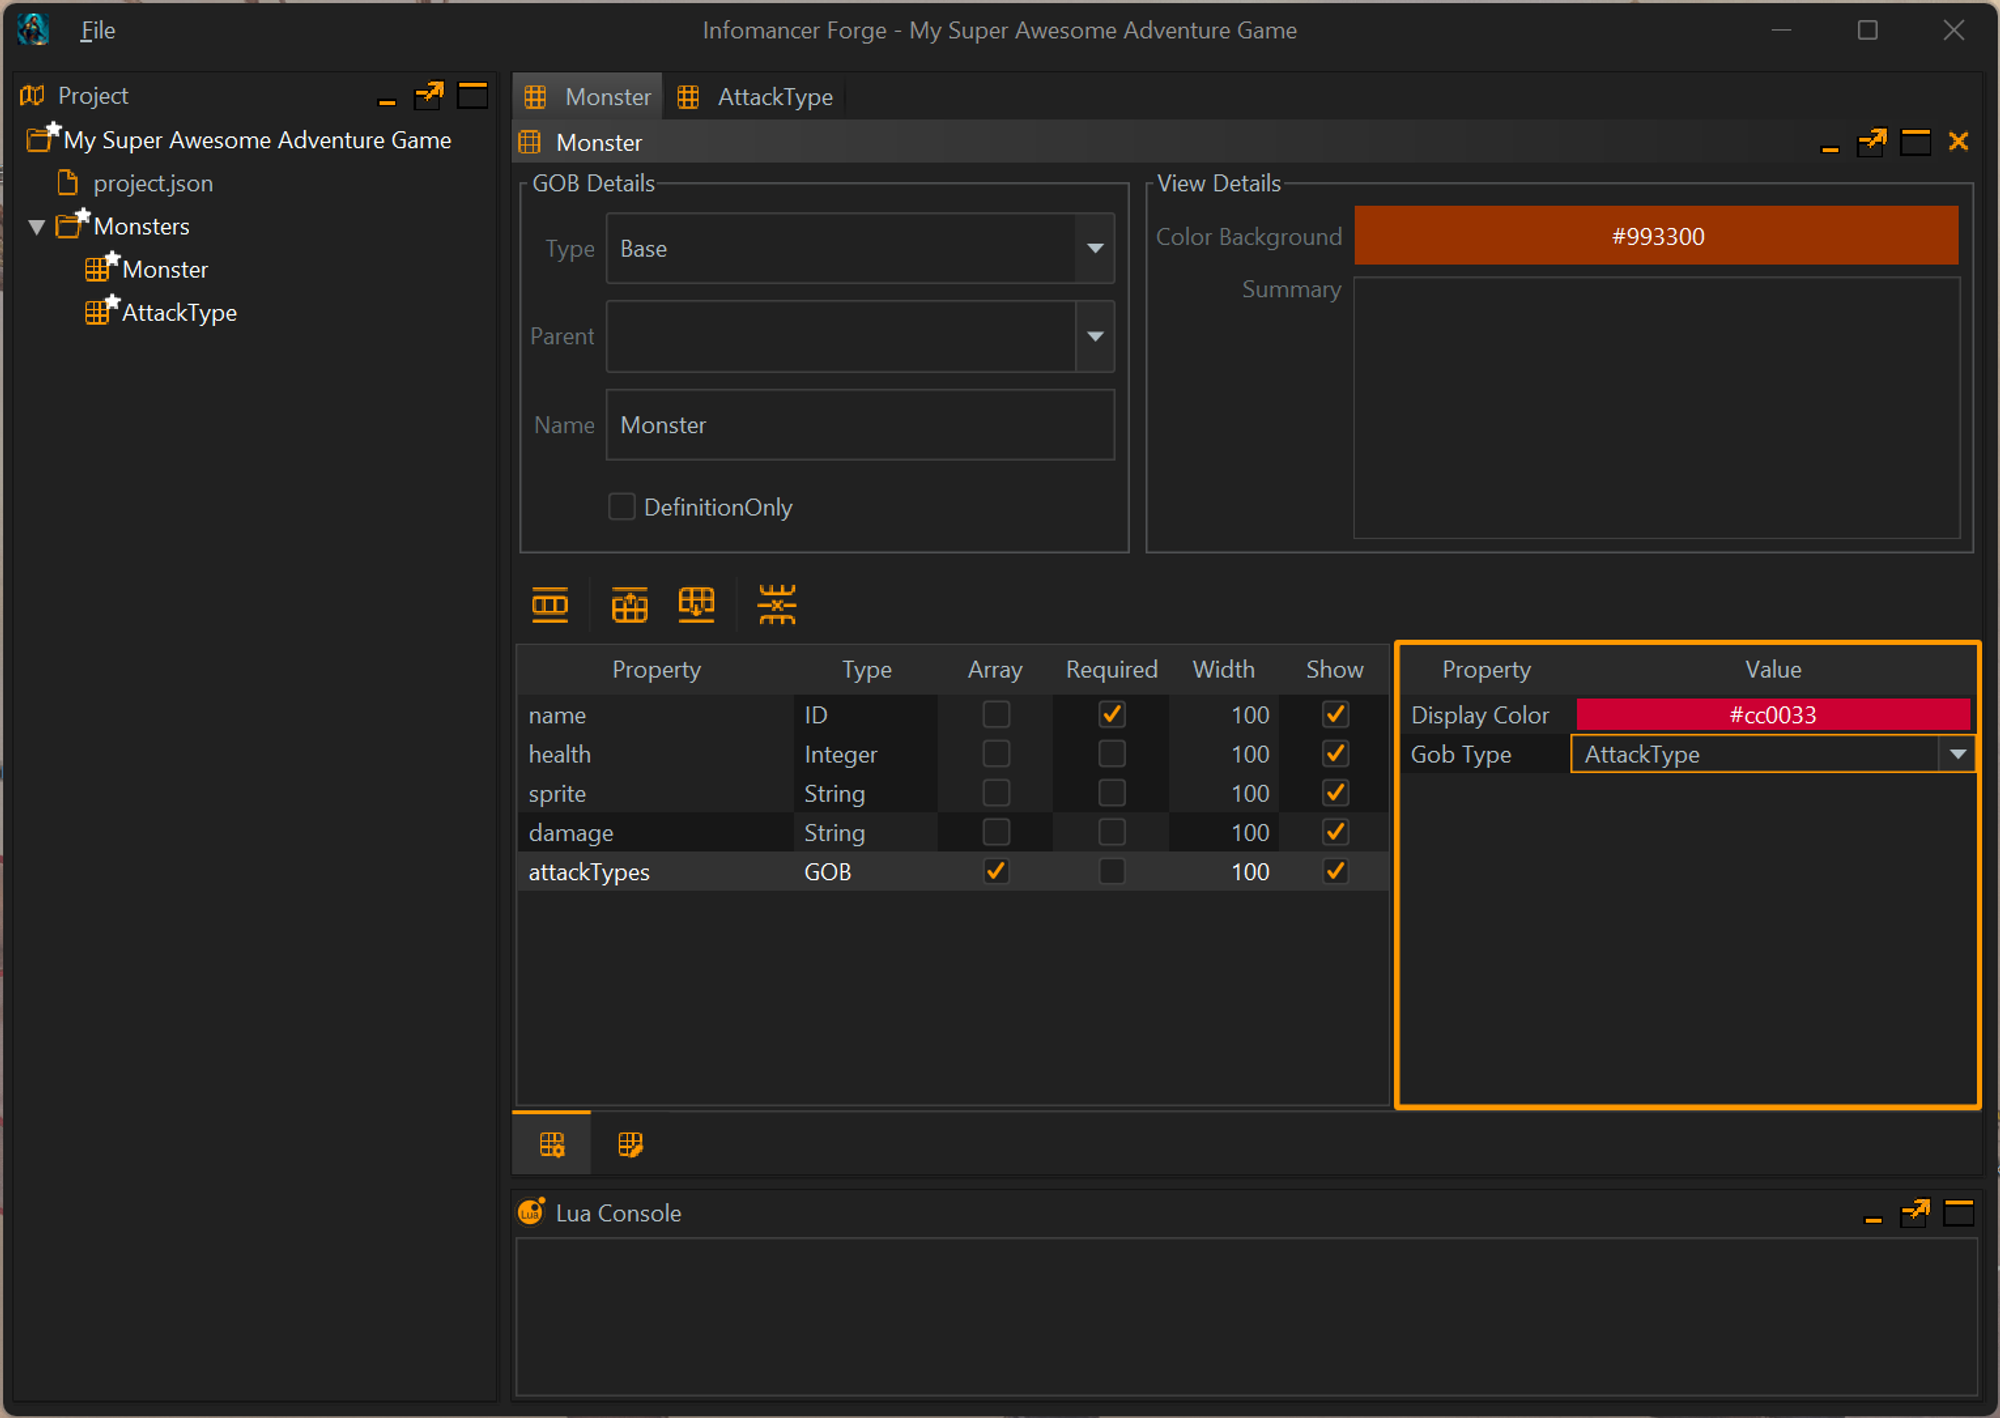
I have now selected the attack type as GOB type linked to and I have also given it a color for the connection. This color will be used in views when showing the types of attacks.
I have also made the Attack Type an array and changes it’s name to attackTypes to better reflect that it is a collection now a single type now.
Creating Instances
So now that we know how to create a GOB we need to create instances. The first and easiest way is via the Data tab at the bottom of the GOB definition.
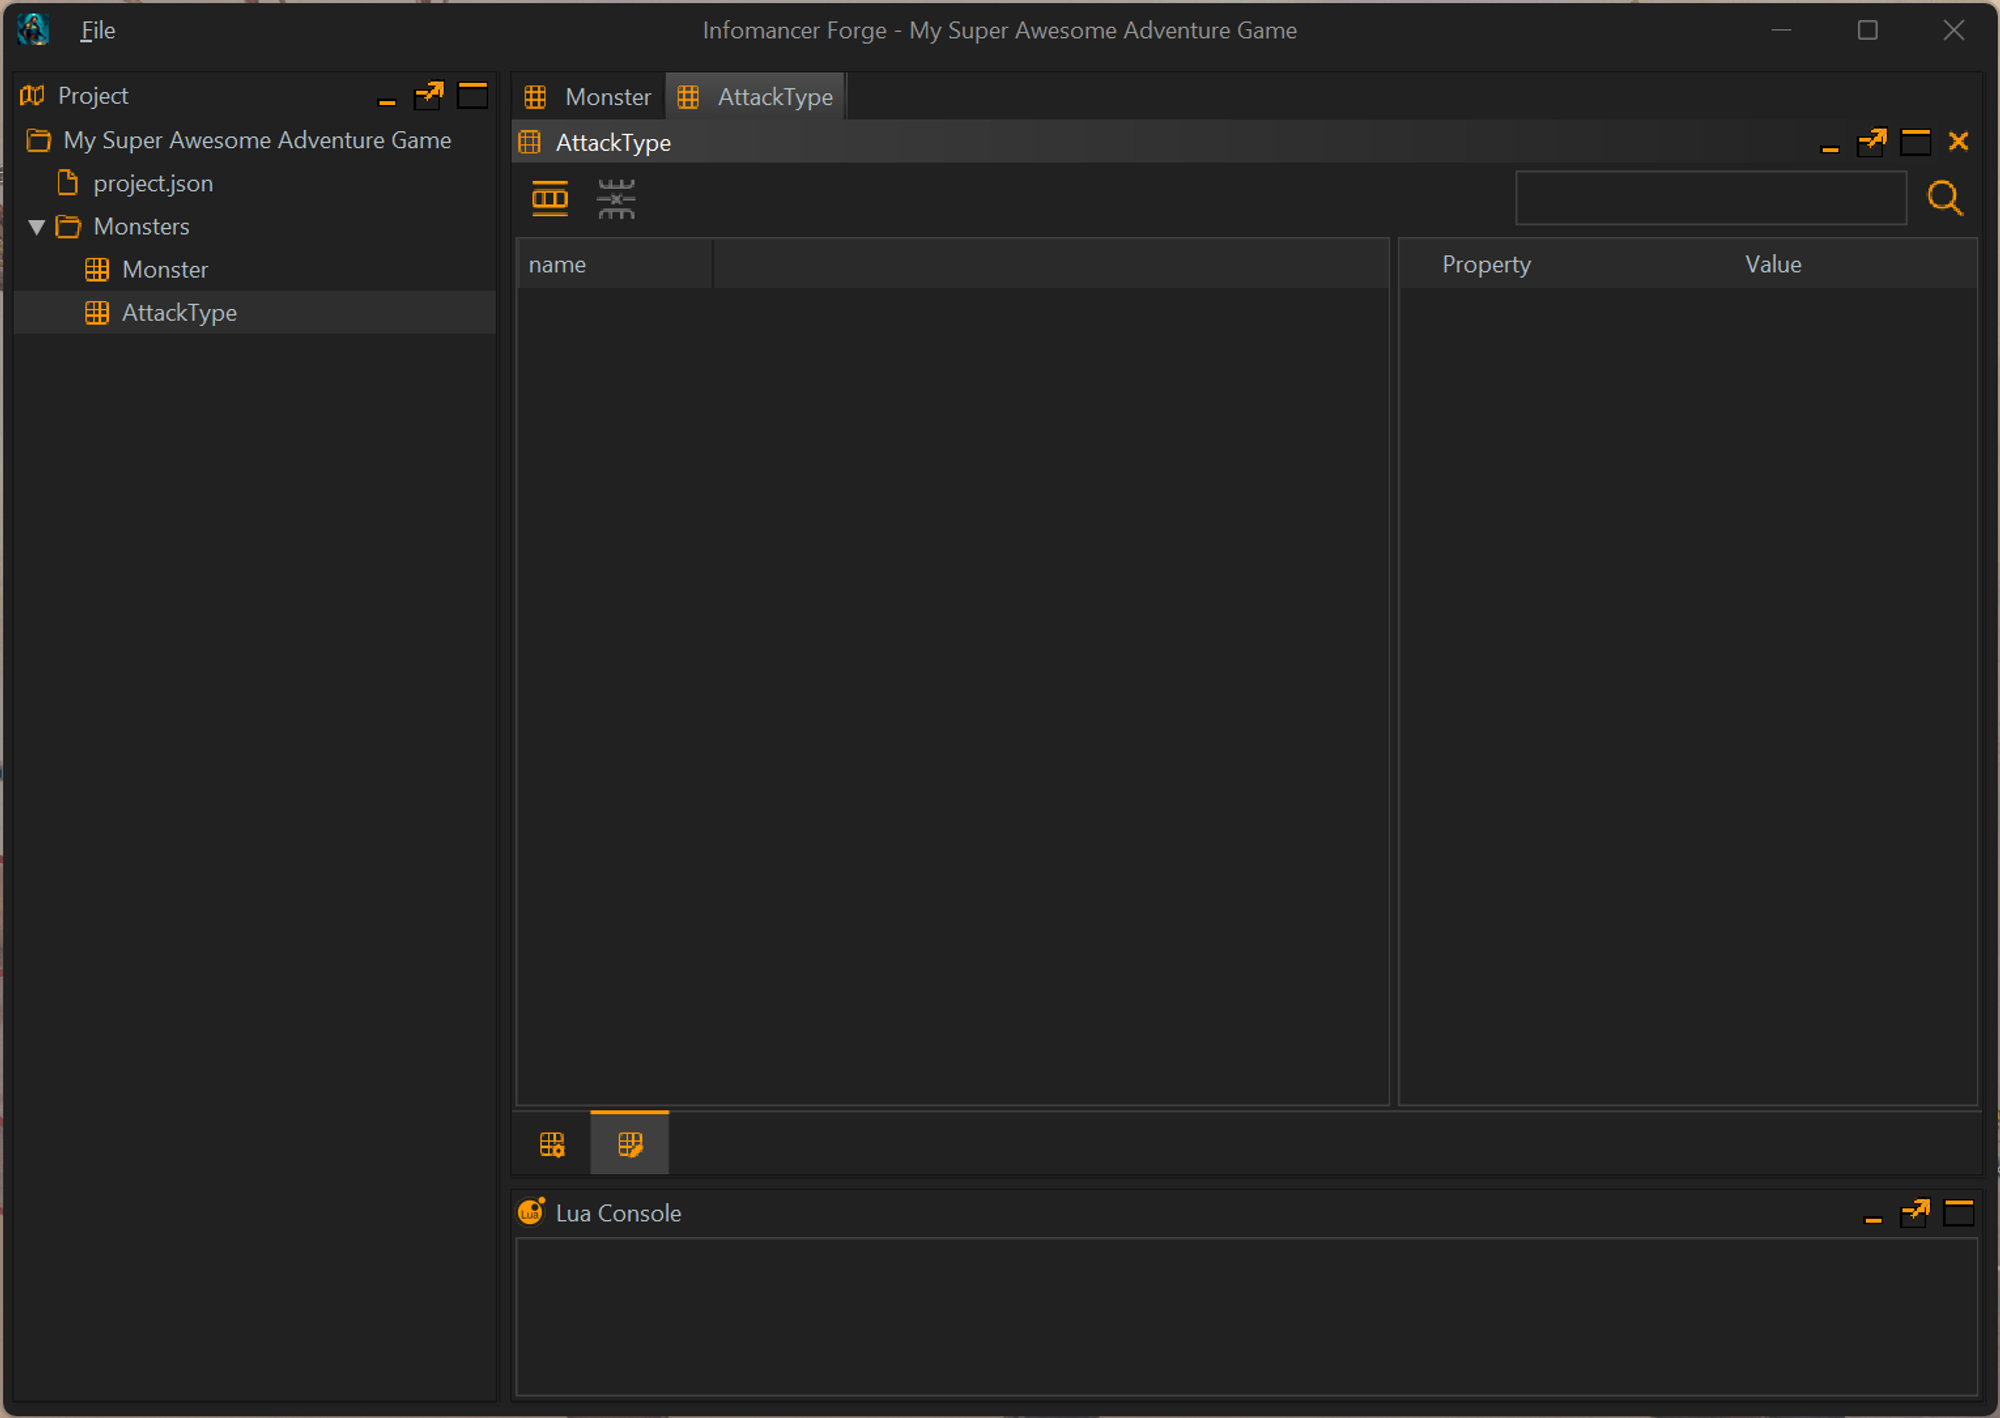
When I select that for AttackTypes you see an empty list with add and delete buttons. I will add a few attack types.
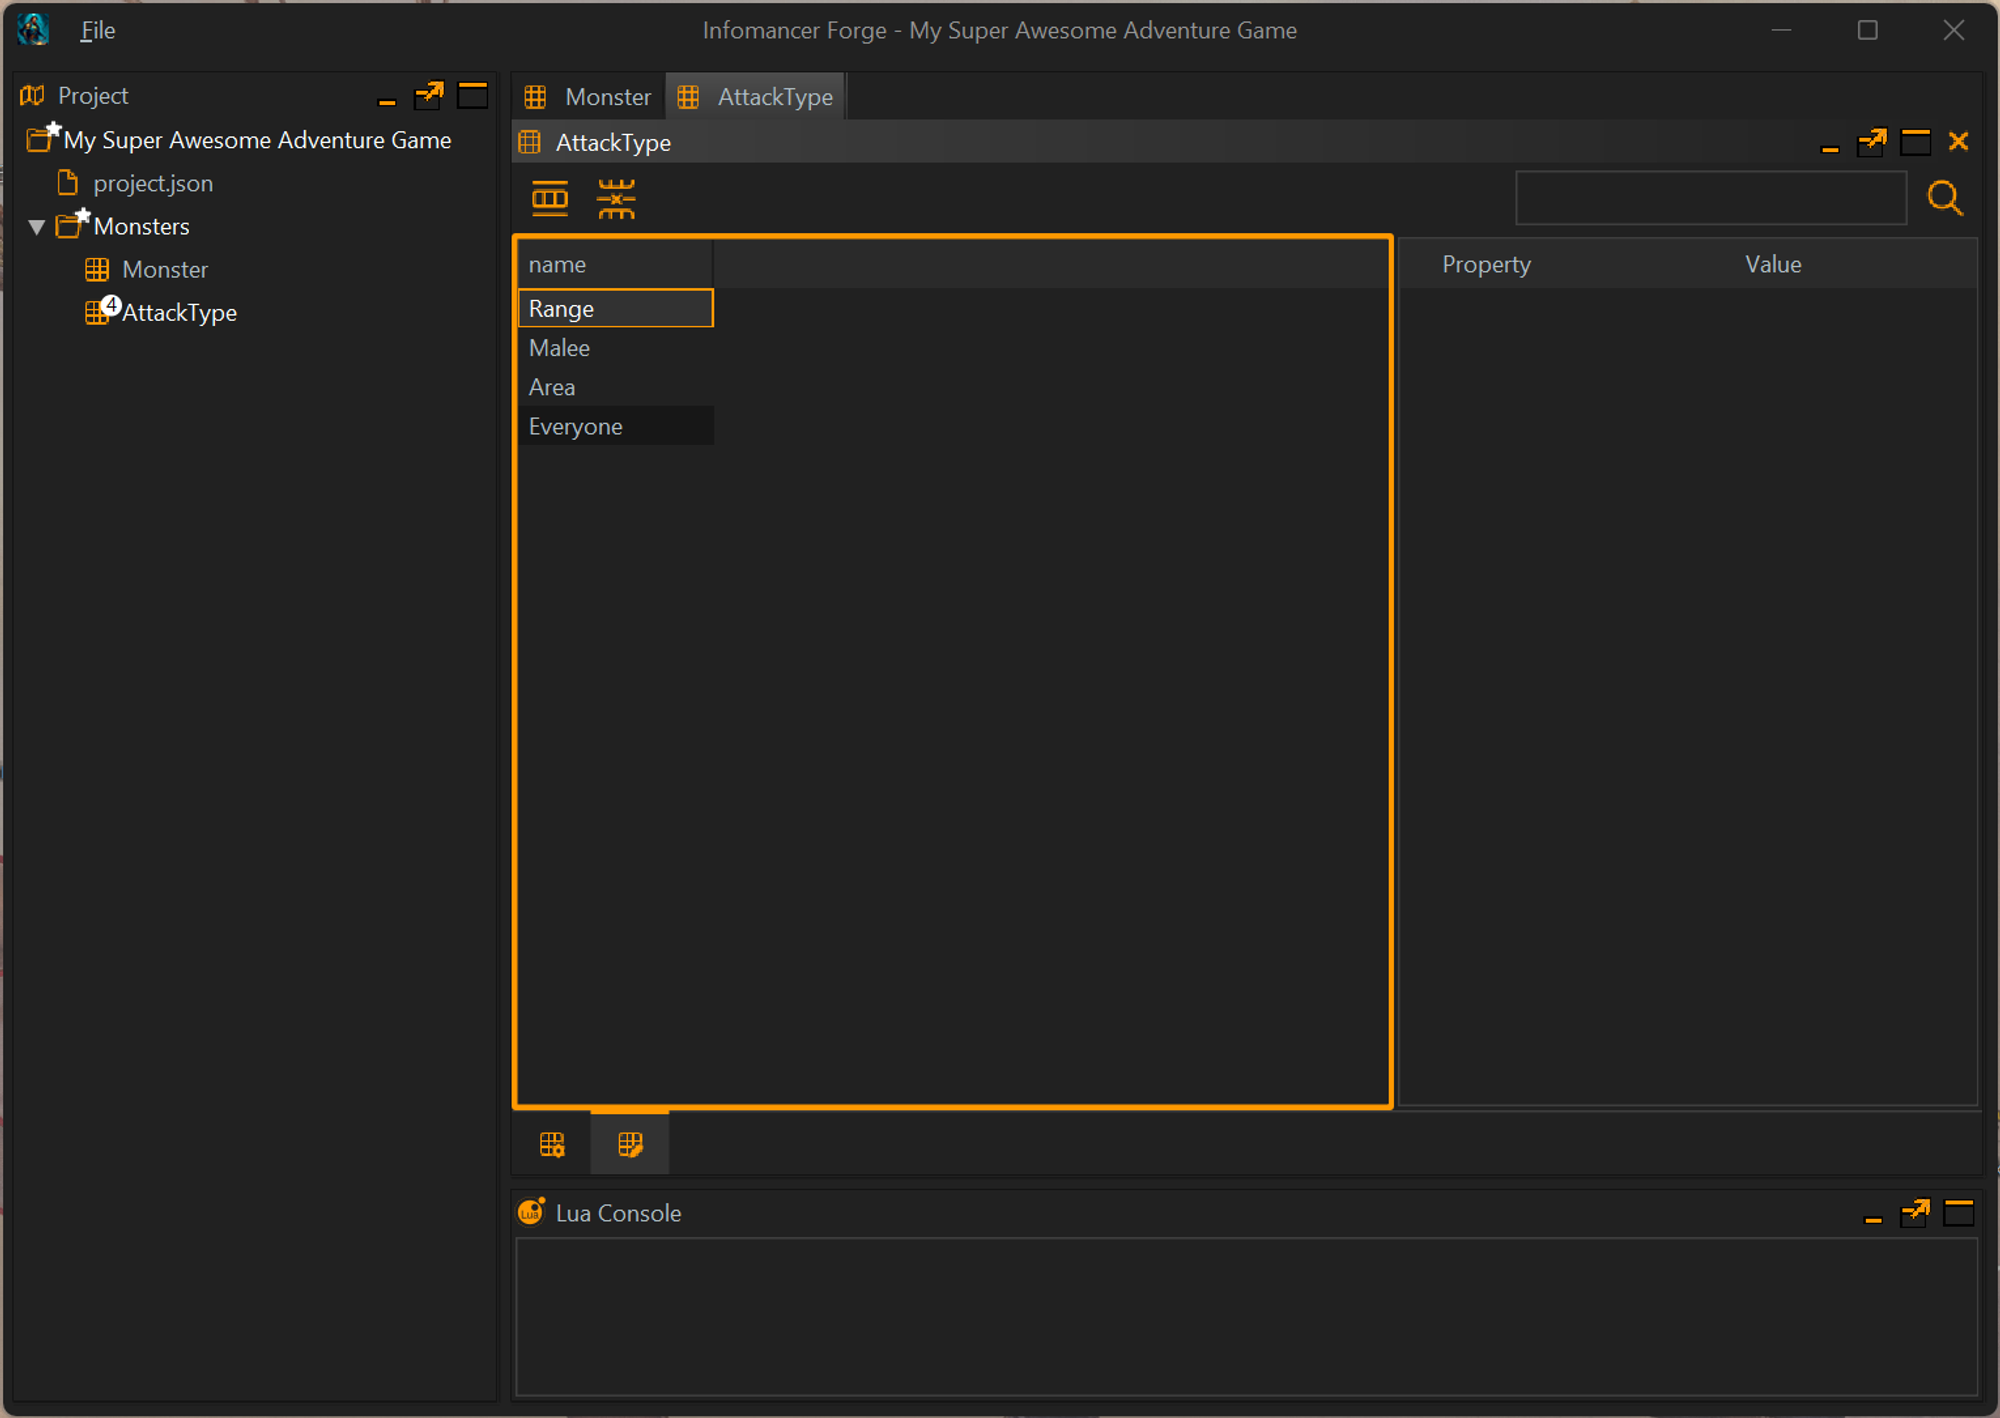
At this point I have made some really basic attacks. We could have been broader and given attacks here details like range and damages and so on. That would allow our design to expand. This is part of your game design choices but for the example we want to keep it simple so it’s just the 4 types.
We will create the Monsters in a View as part of the tutorial but we could have made them in this list too.
Creating Views
Ad with creating GOB right click on the Tree view and select Create View. You will be prompted for a name. Views do not need to have unique names but those named become the files names so you can not have the same names in a single folder and depending on your OS those limitations will differ.
For this we have created a view called Level one monsters and double clicked on it to open it.

You can hide the properties on the right to get more visual space.
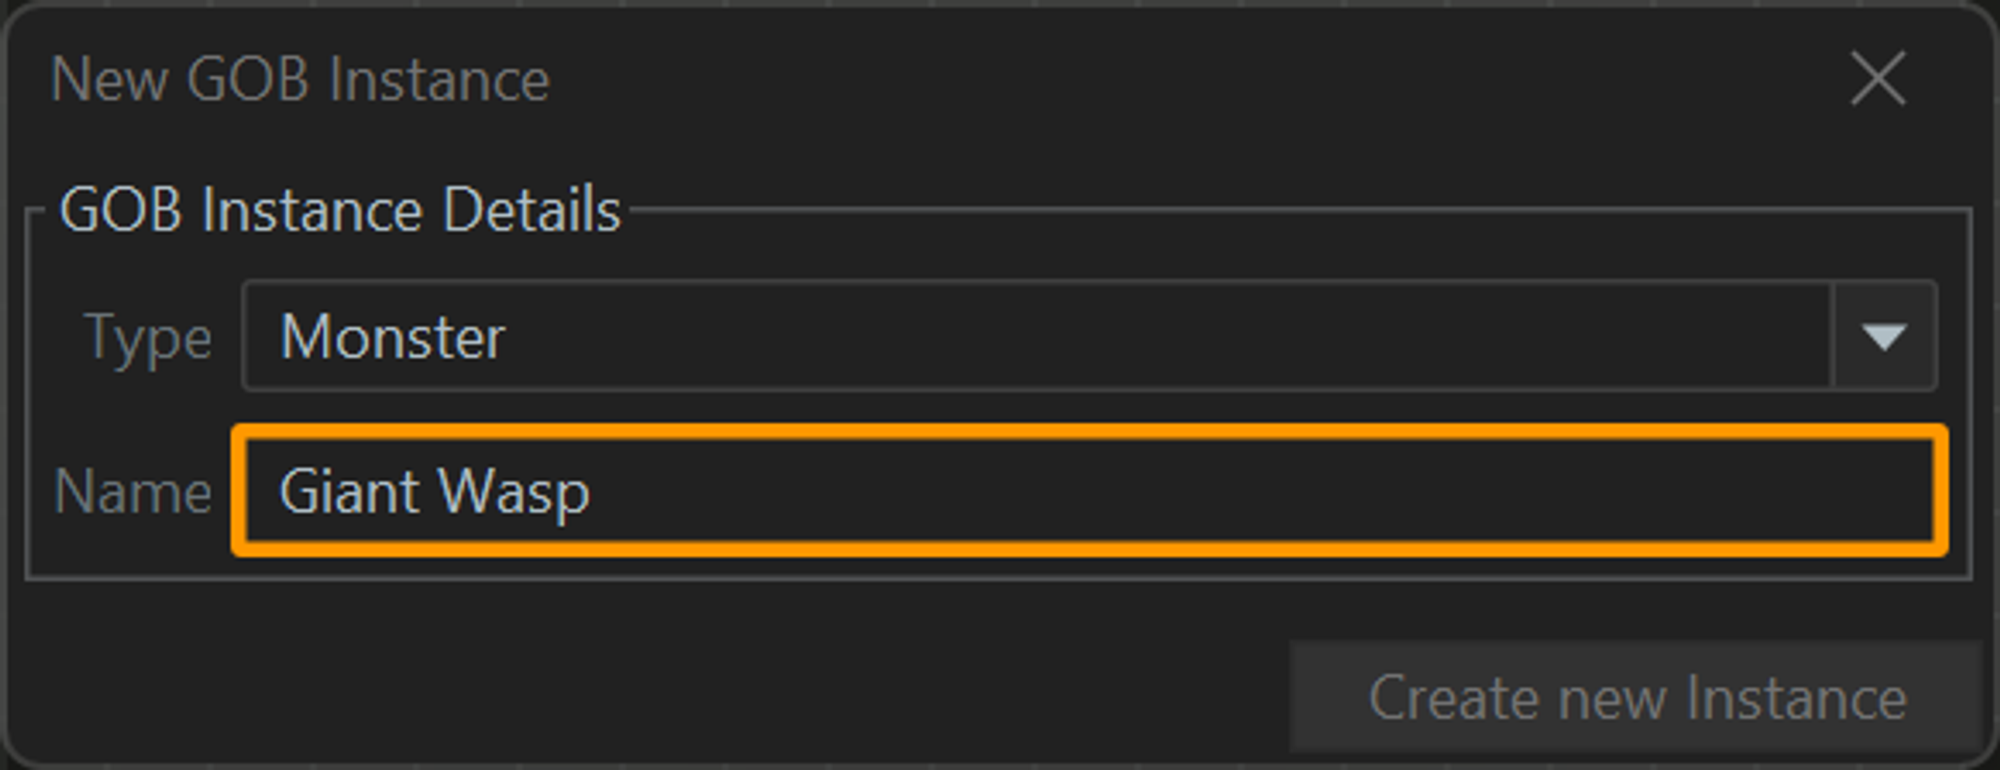
So we can right click in the view to create or link to an excising GOB Instance. For now lets create a monster called Giant Wasp.
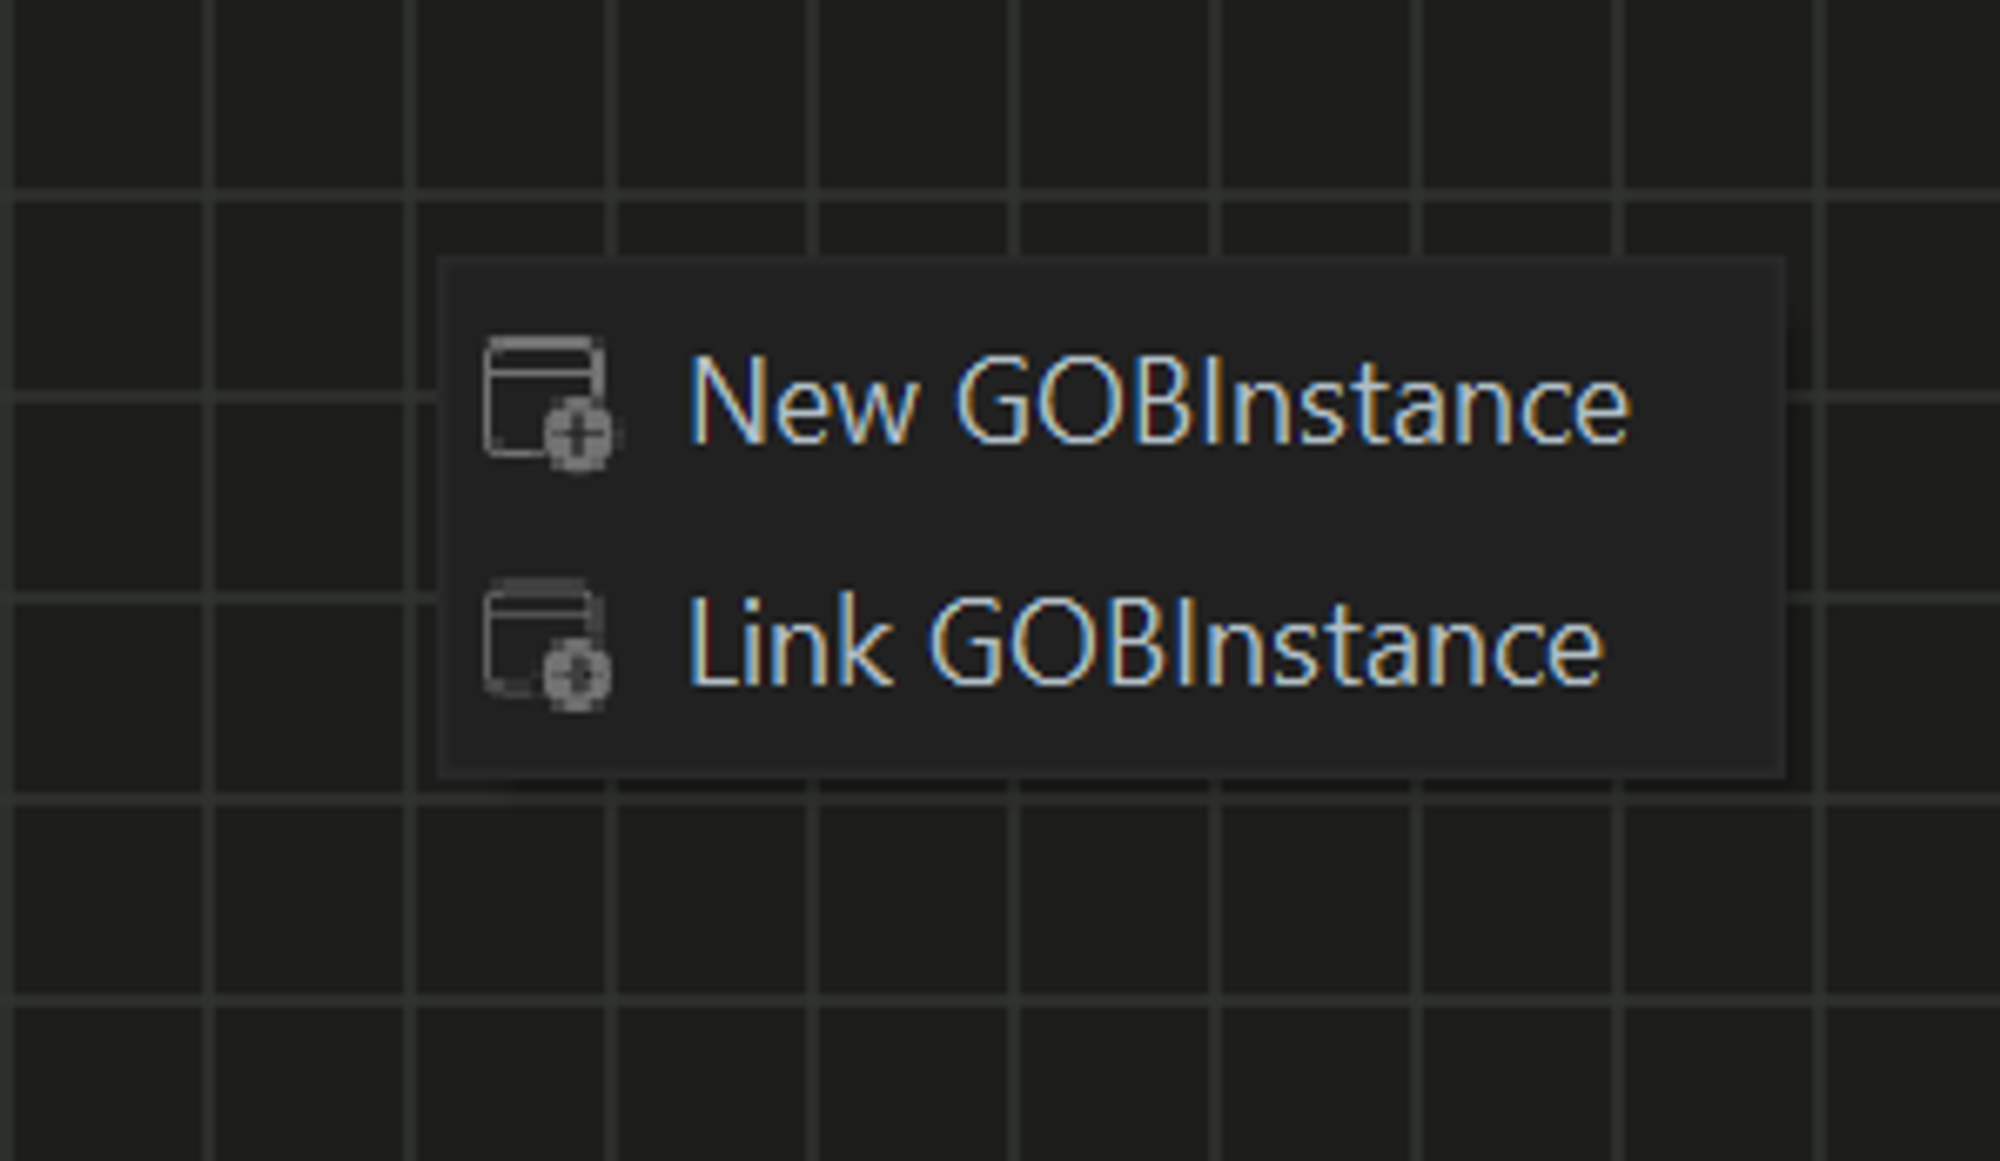
We select New GOBInstance and are presented with a wizard asking for the type and name.
Our view should look something like this now.
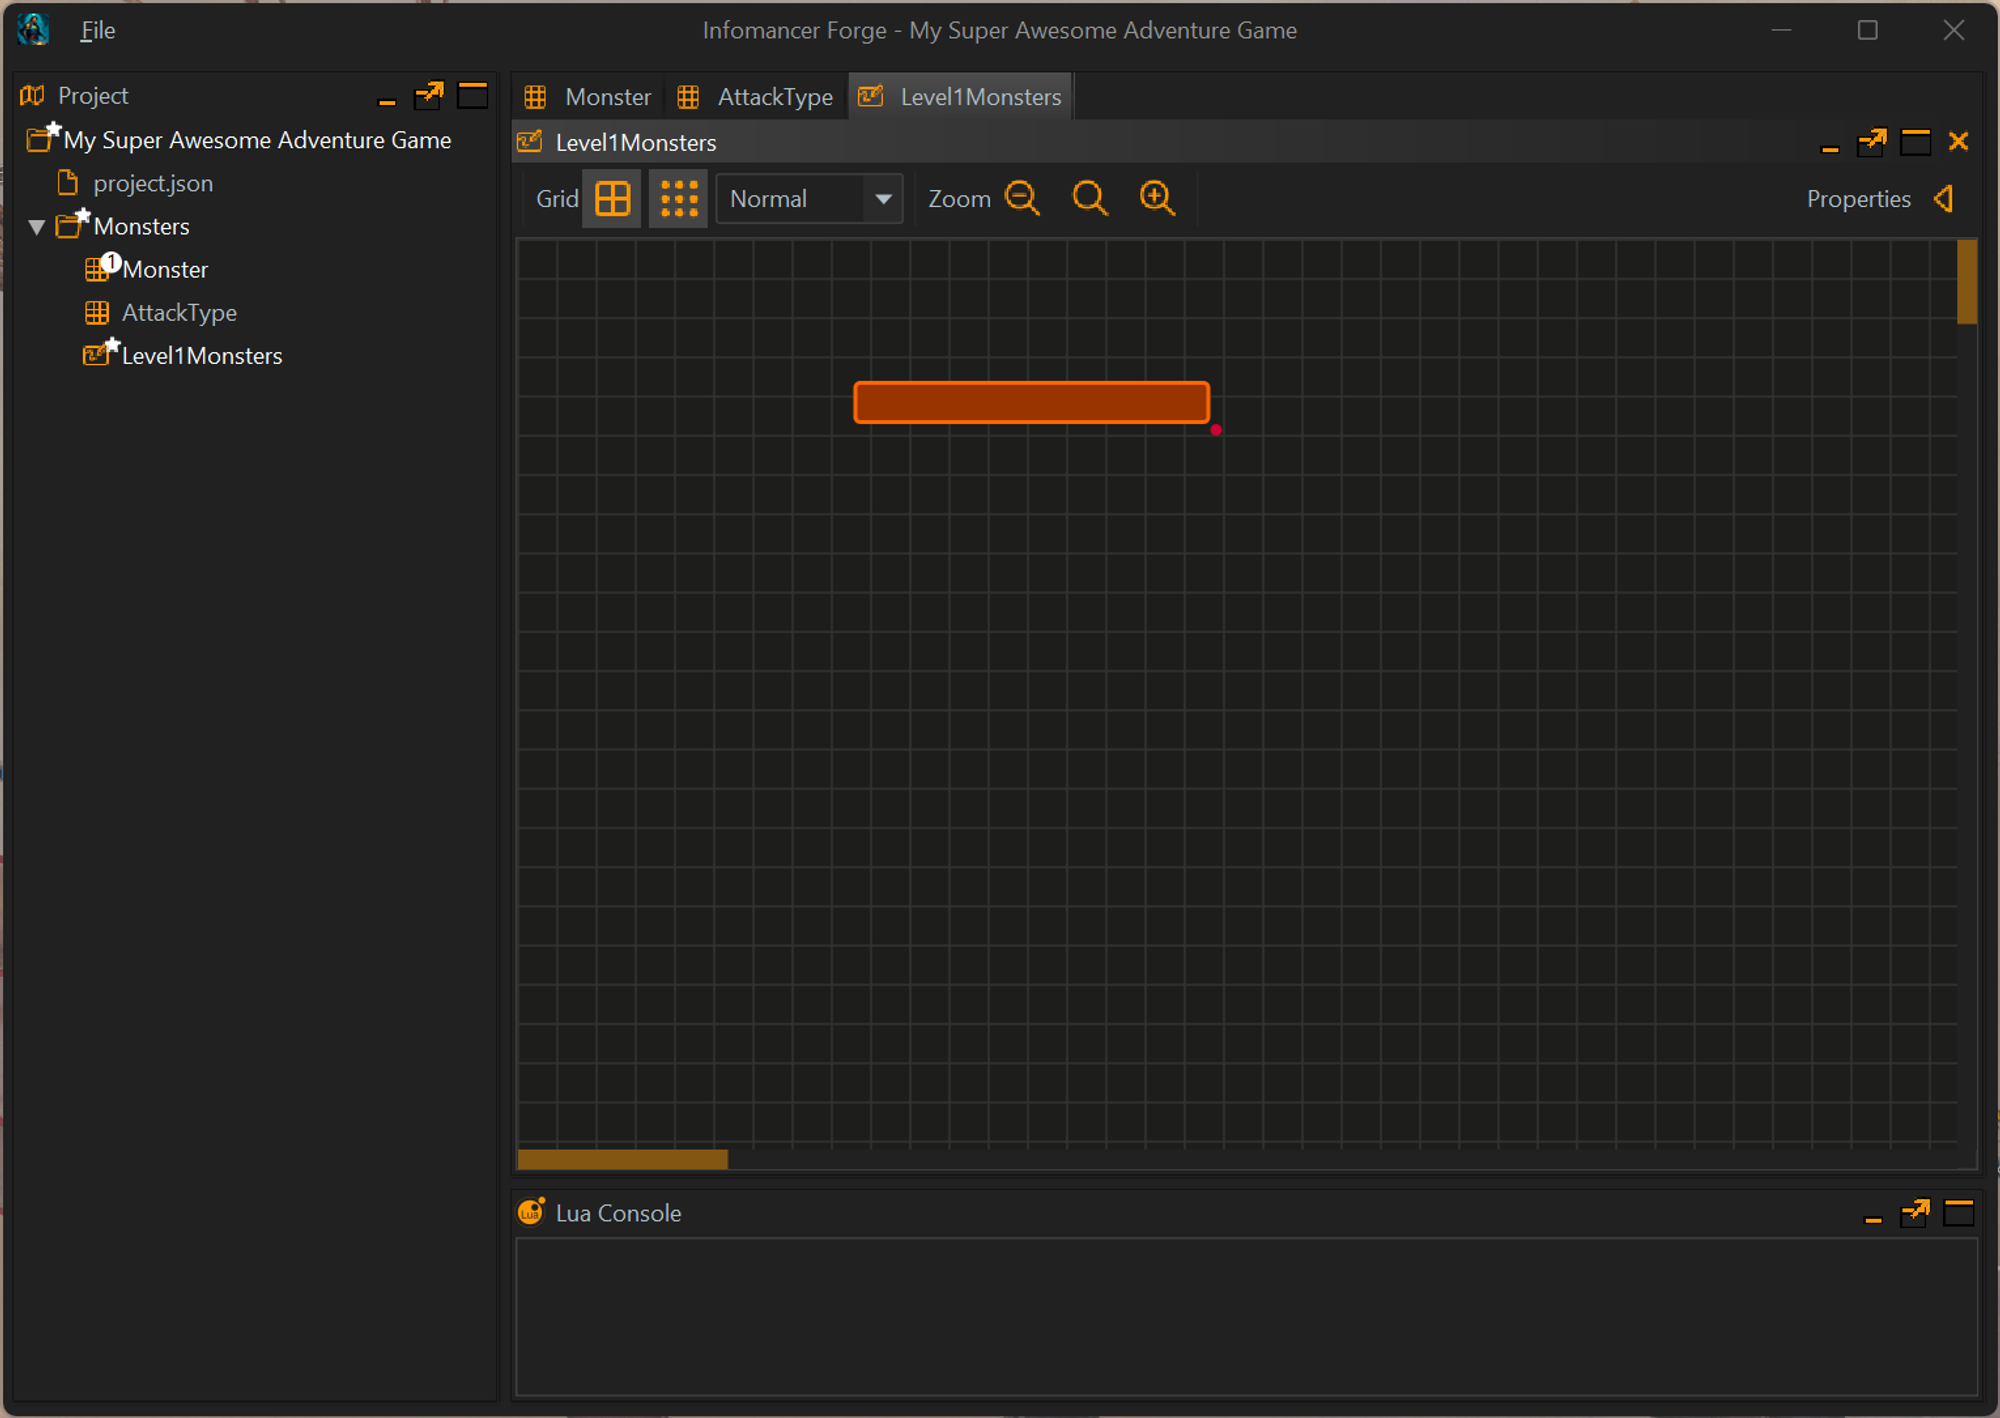
The default for items added to a view is summary and for now that is empty we can change how a GOBInstance if views in a View by right clicking on it and selecting how we would like it shown.
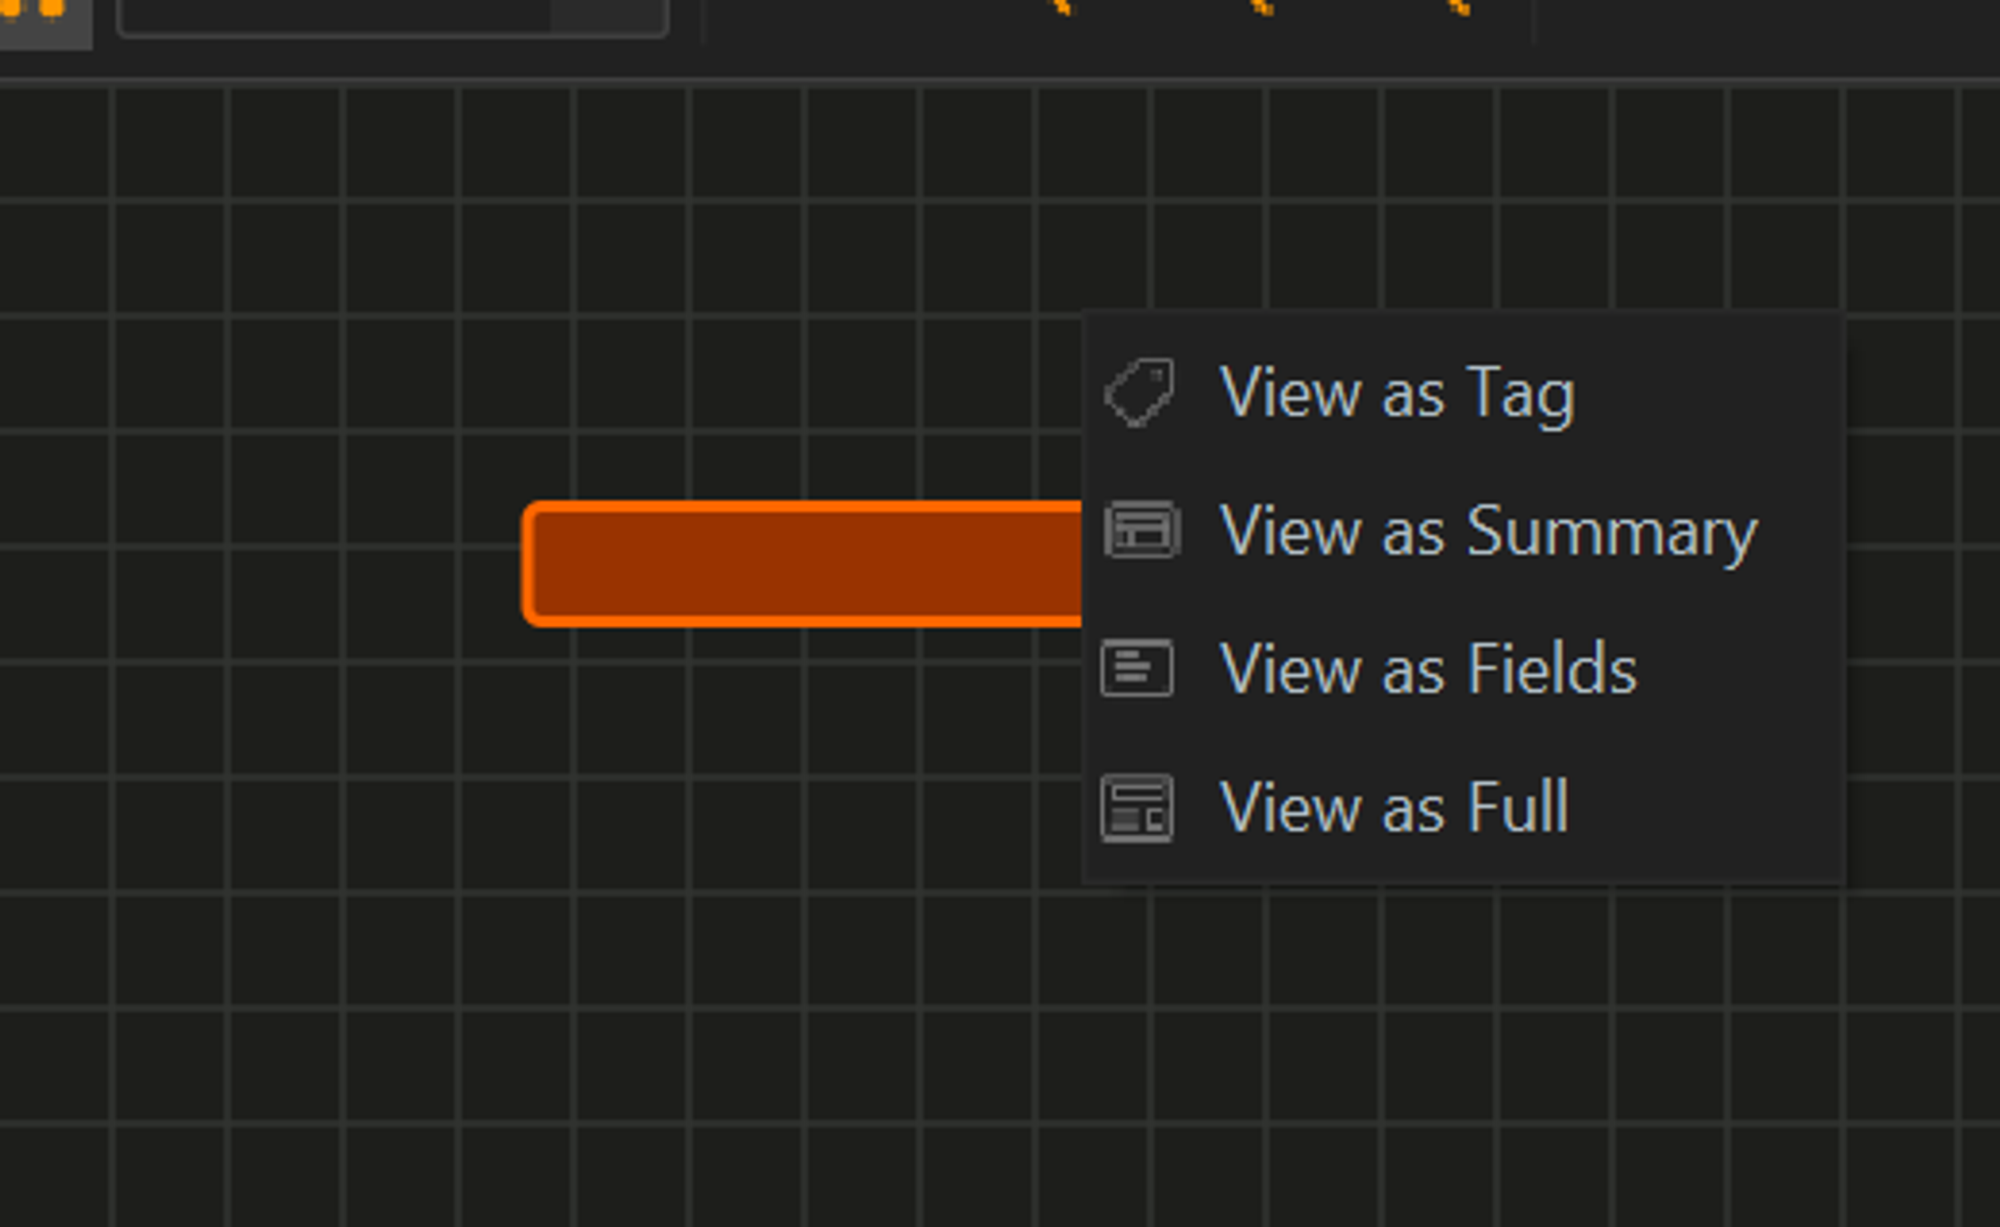
Tag will show only the Name, Summary will show the summary field as written in the GOB design. Filed will show all the field values and full will show everything. For this we will choose Fields.
You can change all in a view and these choices are View specific so something can show as a Tag in one view and Summary in another.
I have captured basic information for the wasp including a string value that as an exampled would represent the Image to use in a game engine.

If we flip to the Data view for the GOB we can see the Wasp has been added to the GOB’s there.
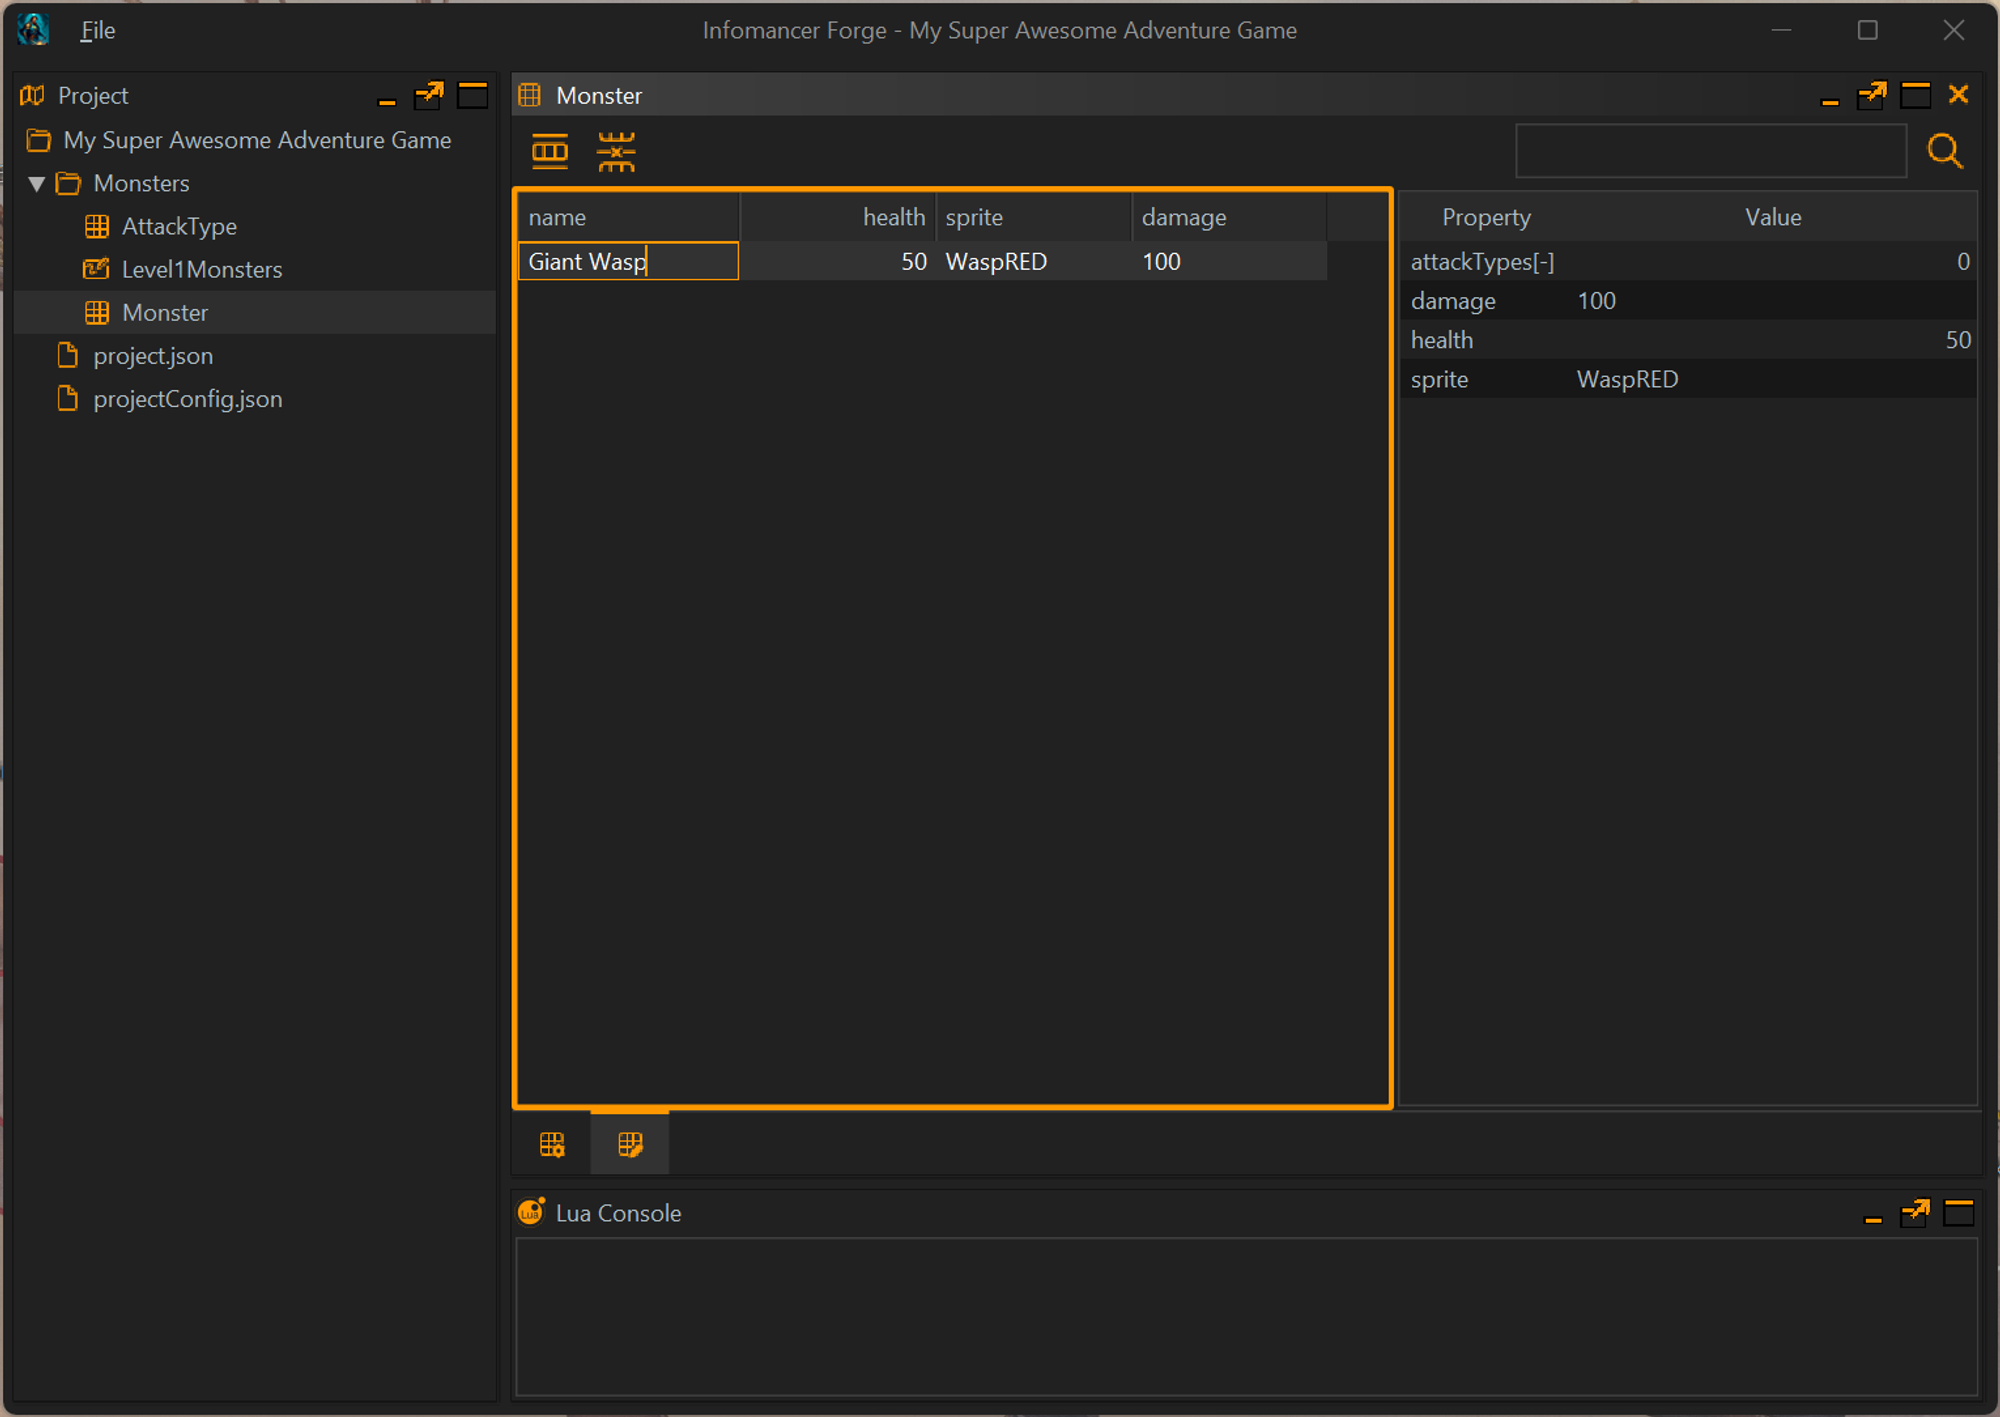
Even if you delete the view now this record will continue to exist in the Project as the View does not own the record it only is a way to view edit and show how records relate.
Lets add another monster say a Caterpillar.
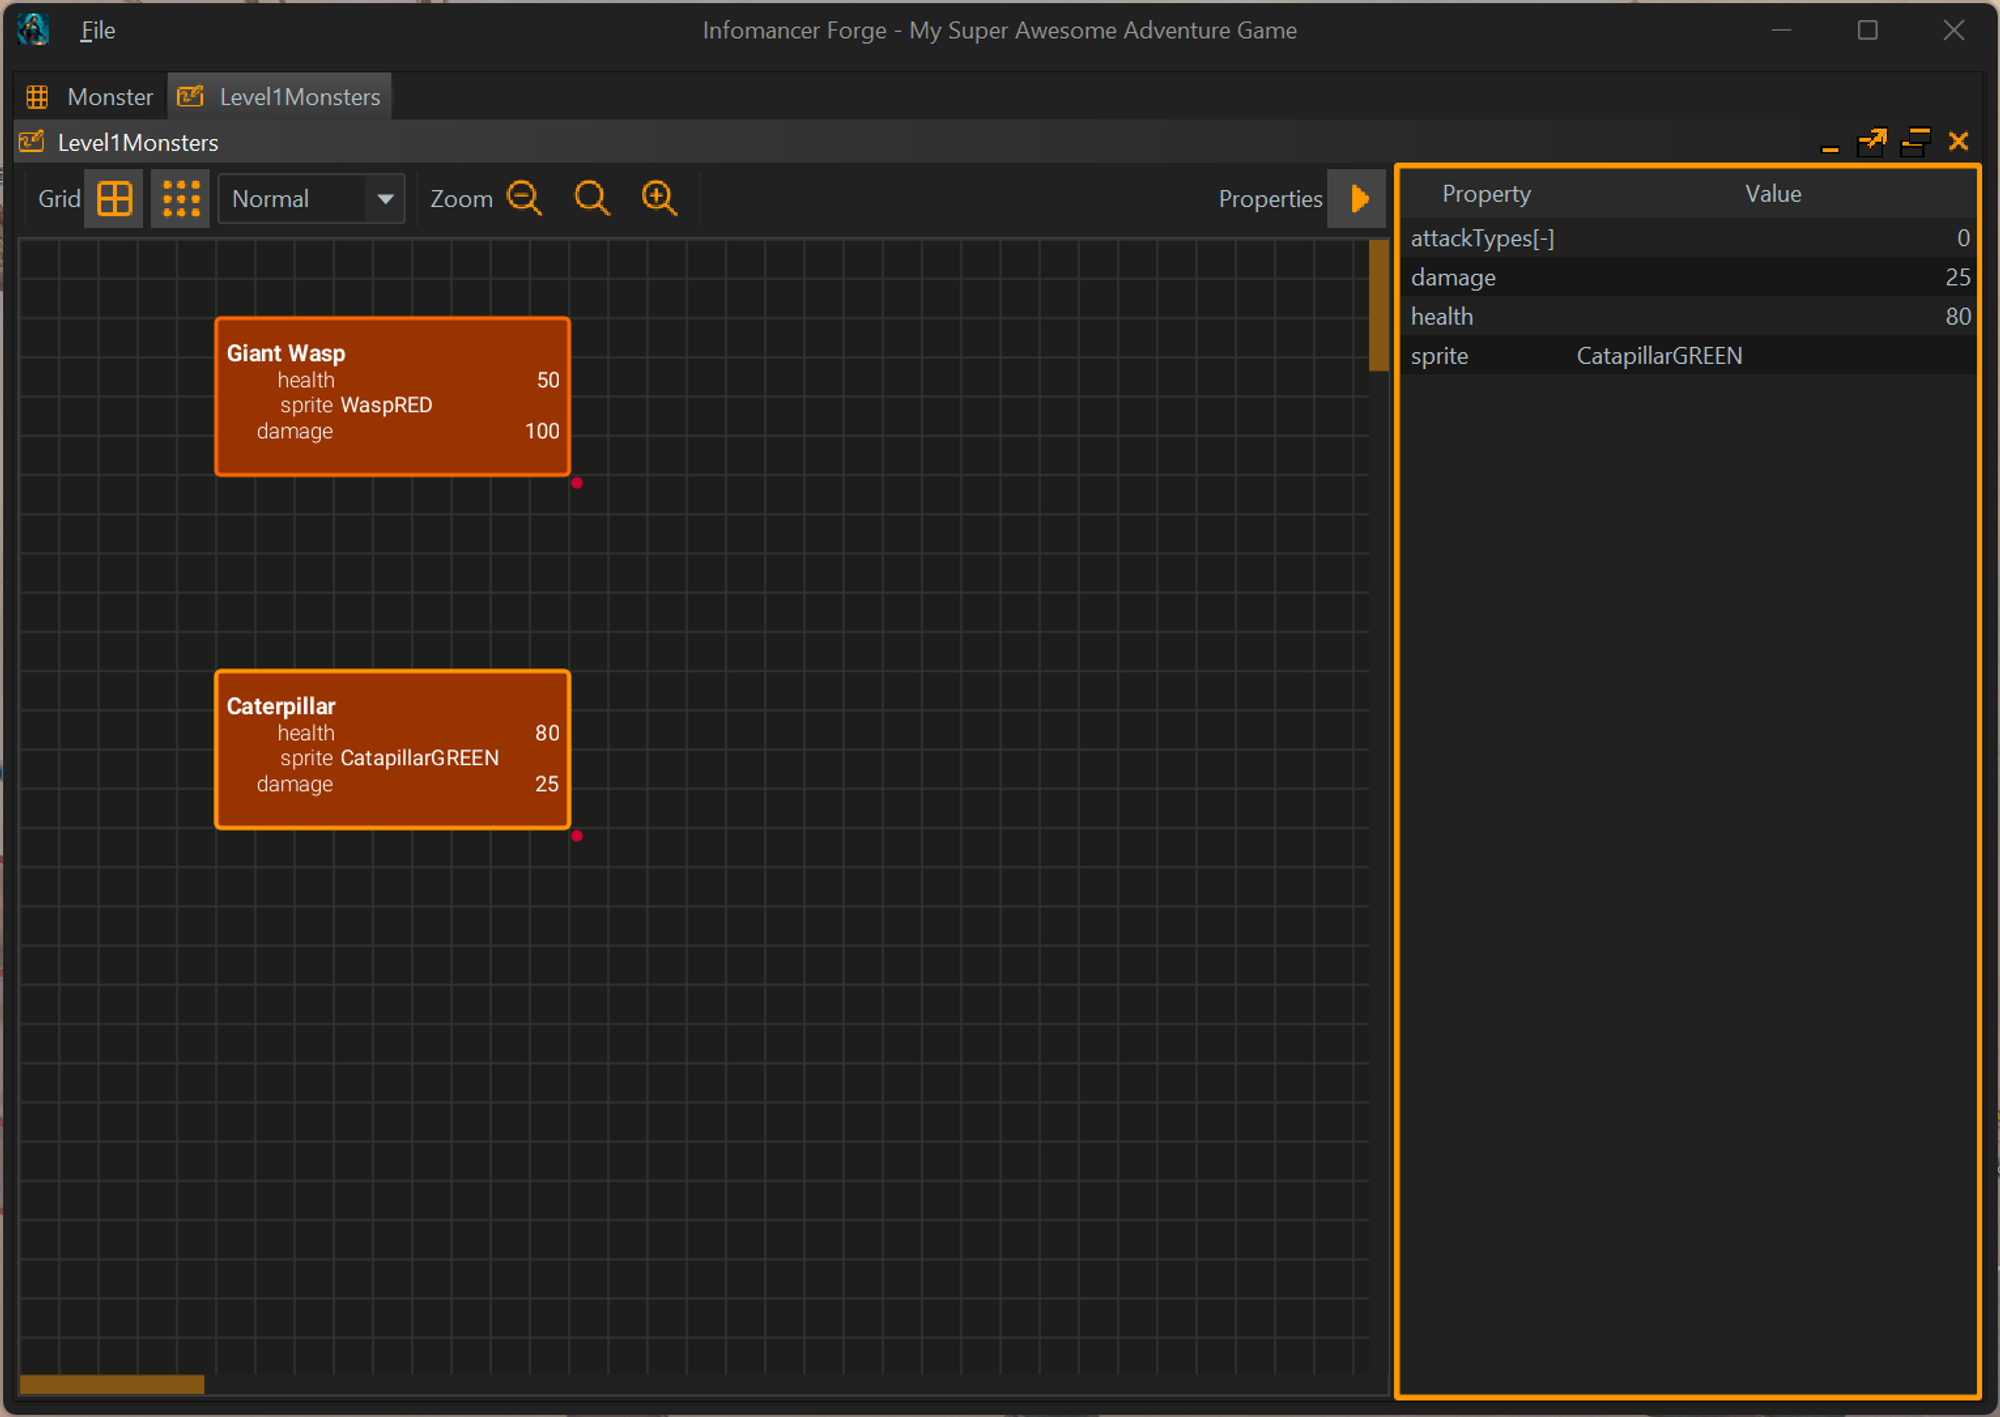
So if you paying close attention we had accidently set the Damage type to string earlier. I went back to the GOB and changed it to type integer and it converted all the string data to integers. Whenever possible the system will try change your data without loosing what was captured.
Now we need to capture the types of attackes per Monster. I will start by linking in all the types into the view. So this time we select Link not New gob and then select the GOB we want to add to the view. A GOB instance can only appear in one place on any view.

After adding all we and showing them all as TAG we can see the attack types.
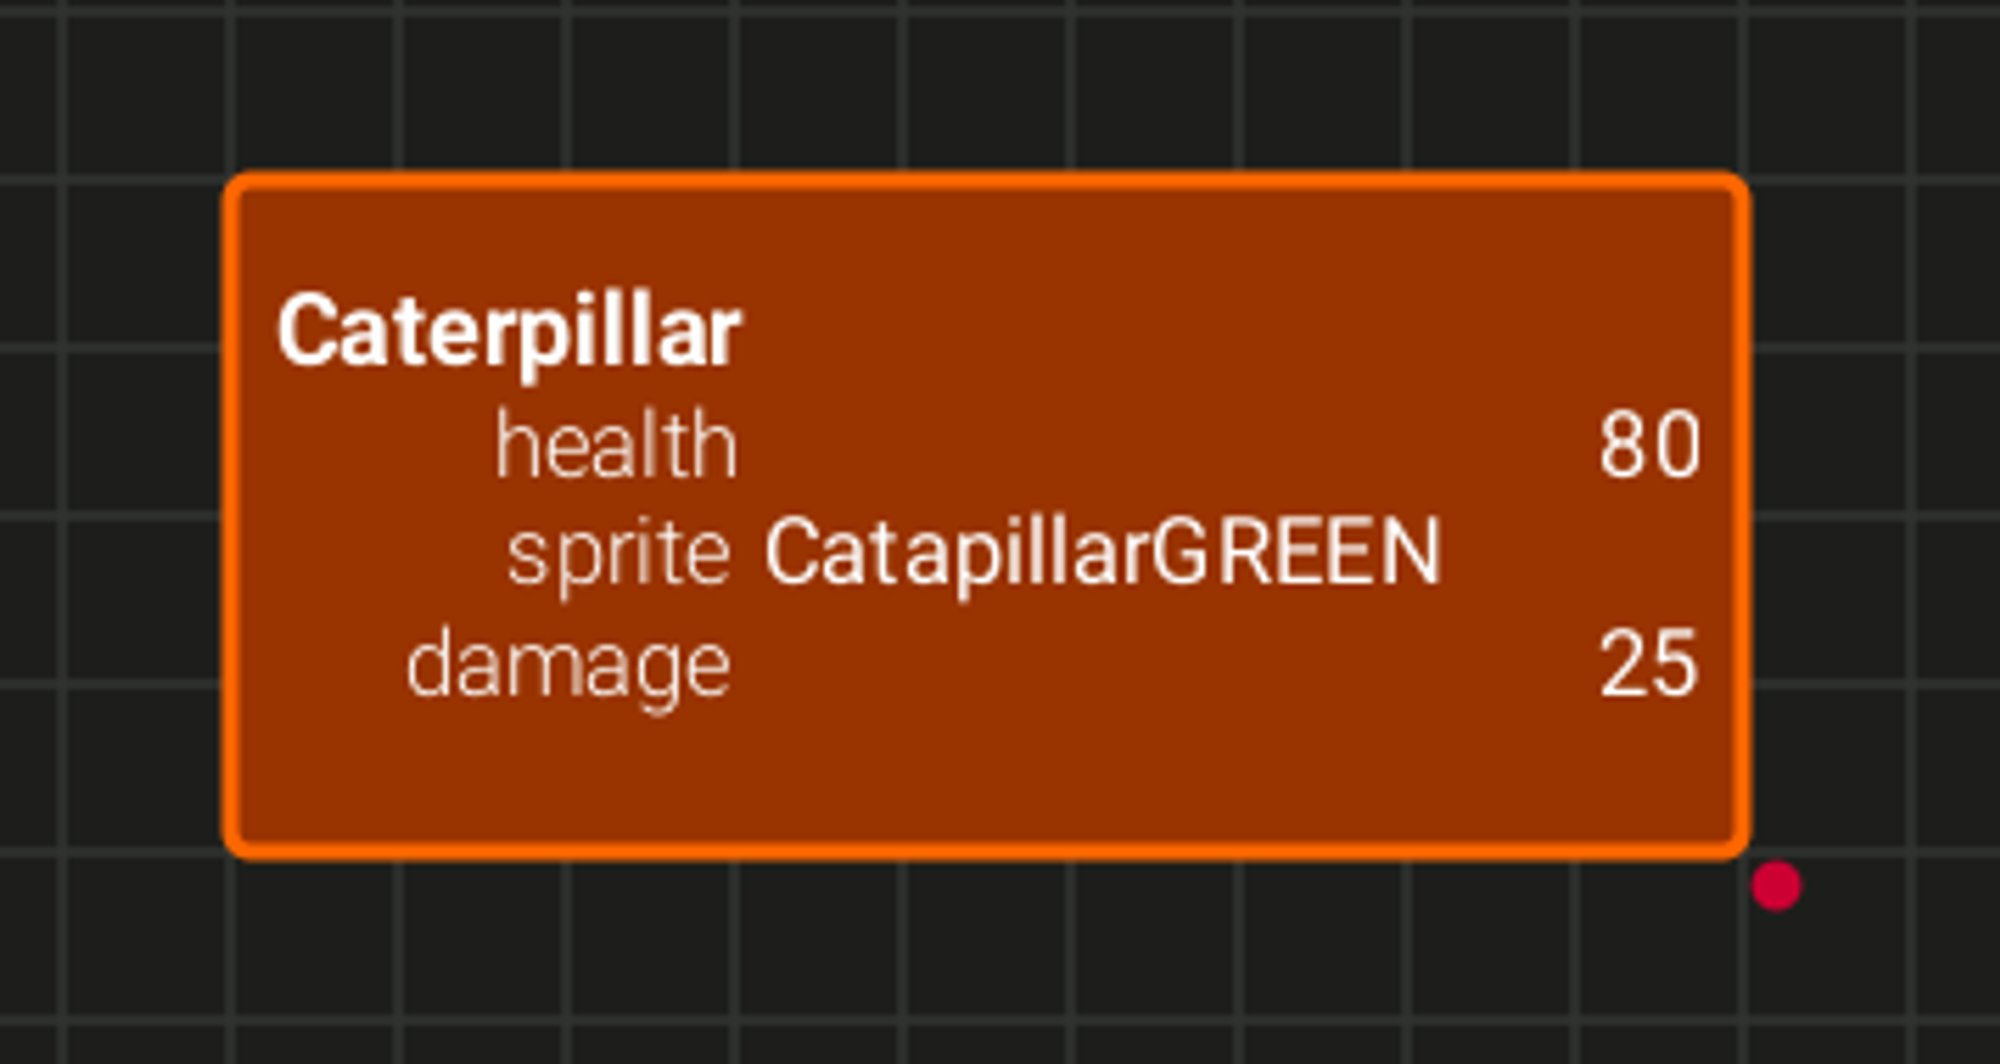
The color matched the color we choose for the GOB when property when we added it. If it was a single the circle would be an outline not filled in. Also if the Type referenced was embedded the circle become square showing that the instance will belong to the base and will be exported as part of it now as a link.
We can drag and move the connecters to a position we prefer. I moved both to more or less the center of the view.
To create connections we right click and drag. We can drag to an open spot on the view to then create a new or link there or to an instance in the view. I will drag from Wasp to the Melee instance.
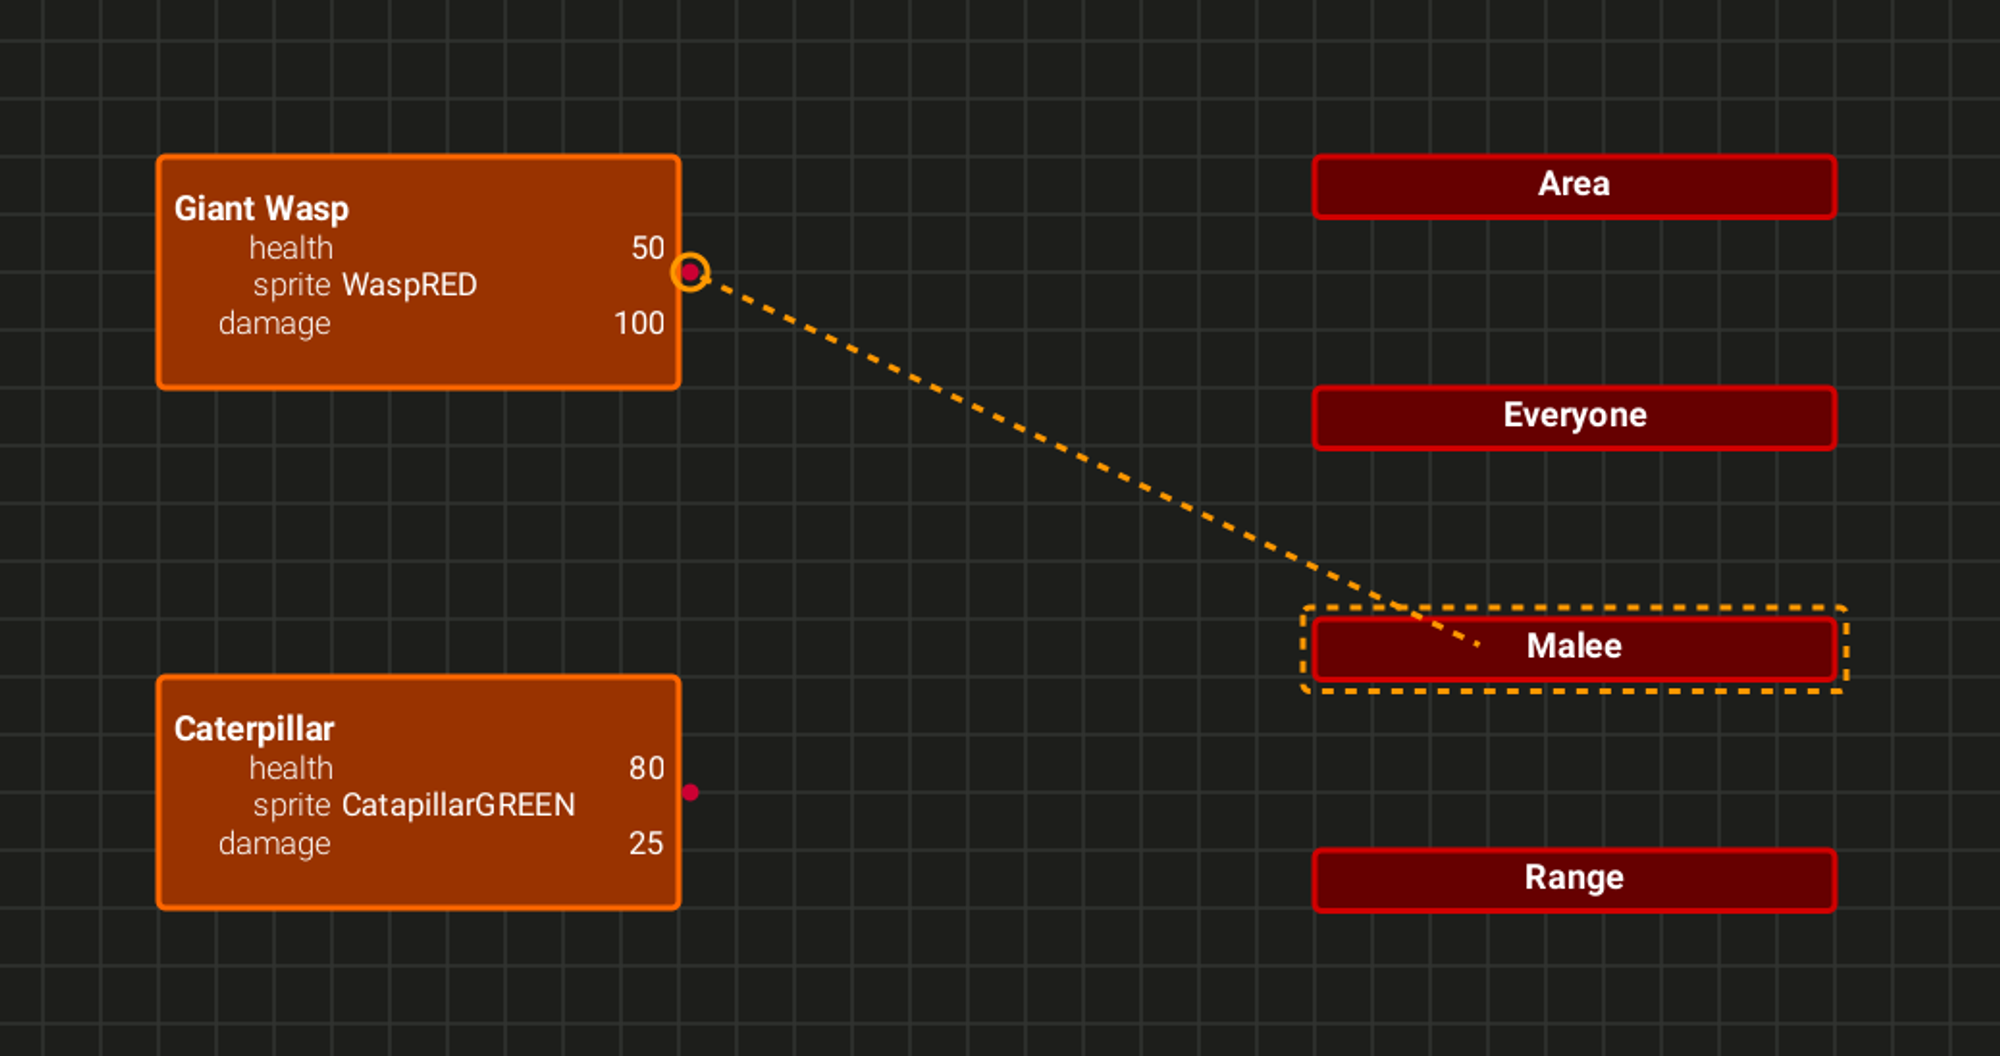
Once I release it will create the connected link between the Wasp and the Melee damage as can be seen below.
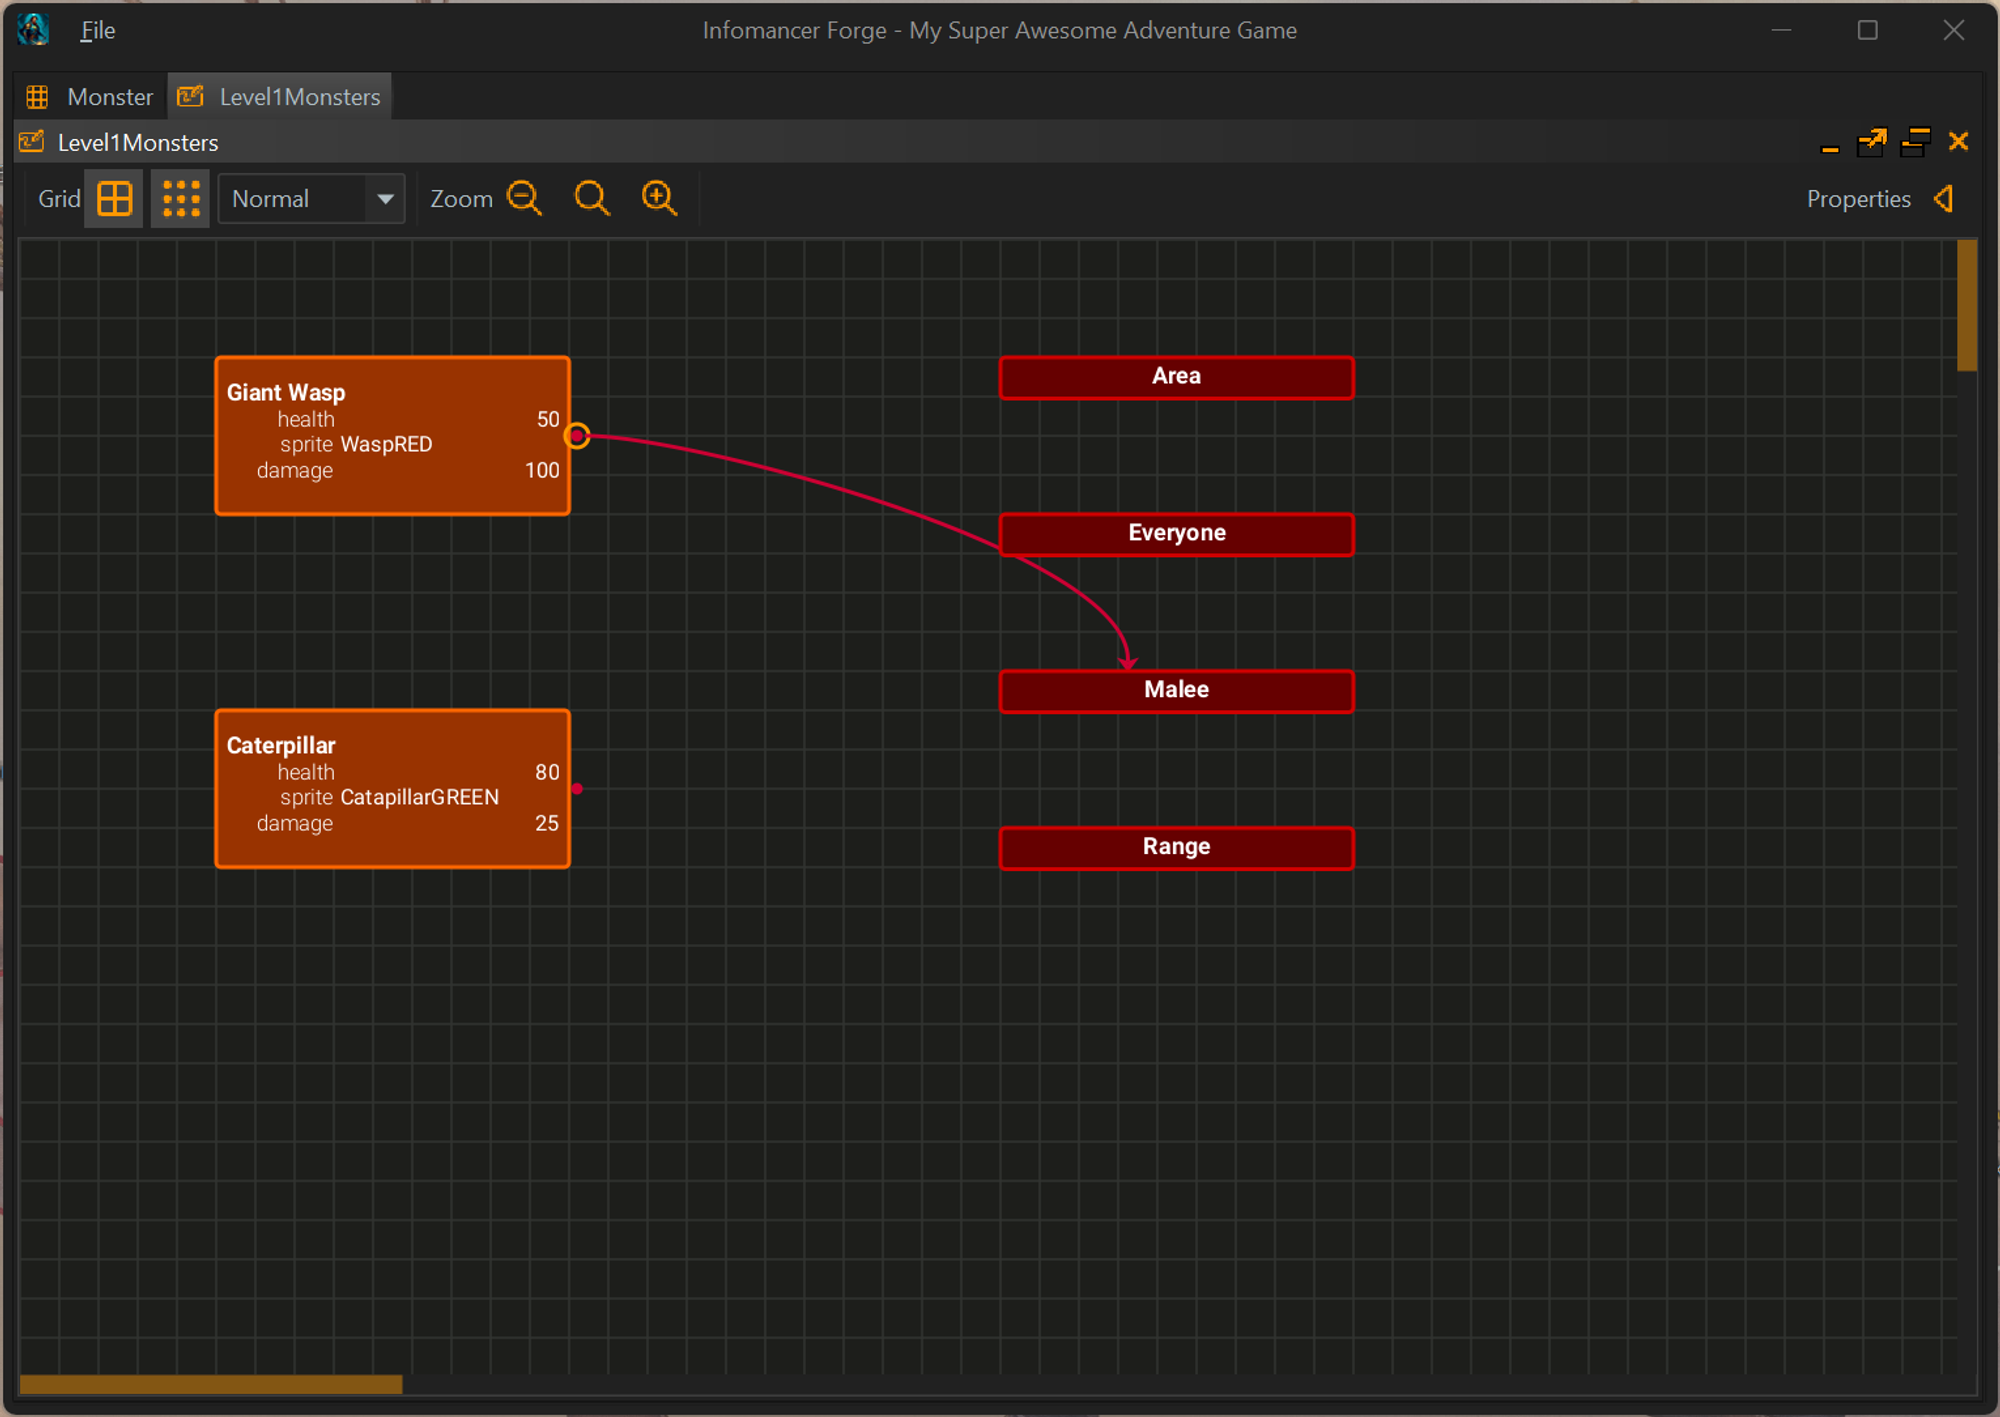
If you draw to connect to something already connected then it will remove the connection.
We will now repeat the process with the Caterpillar linking it to Area and Range.
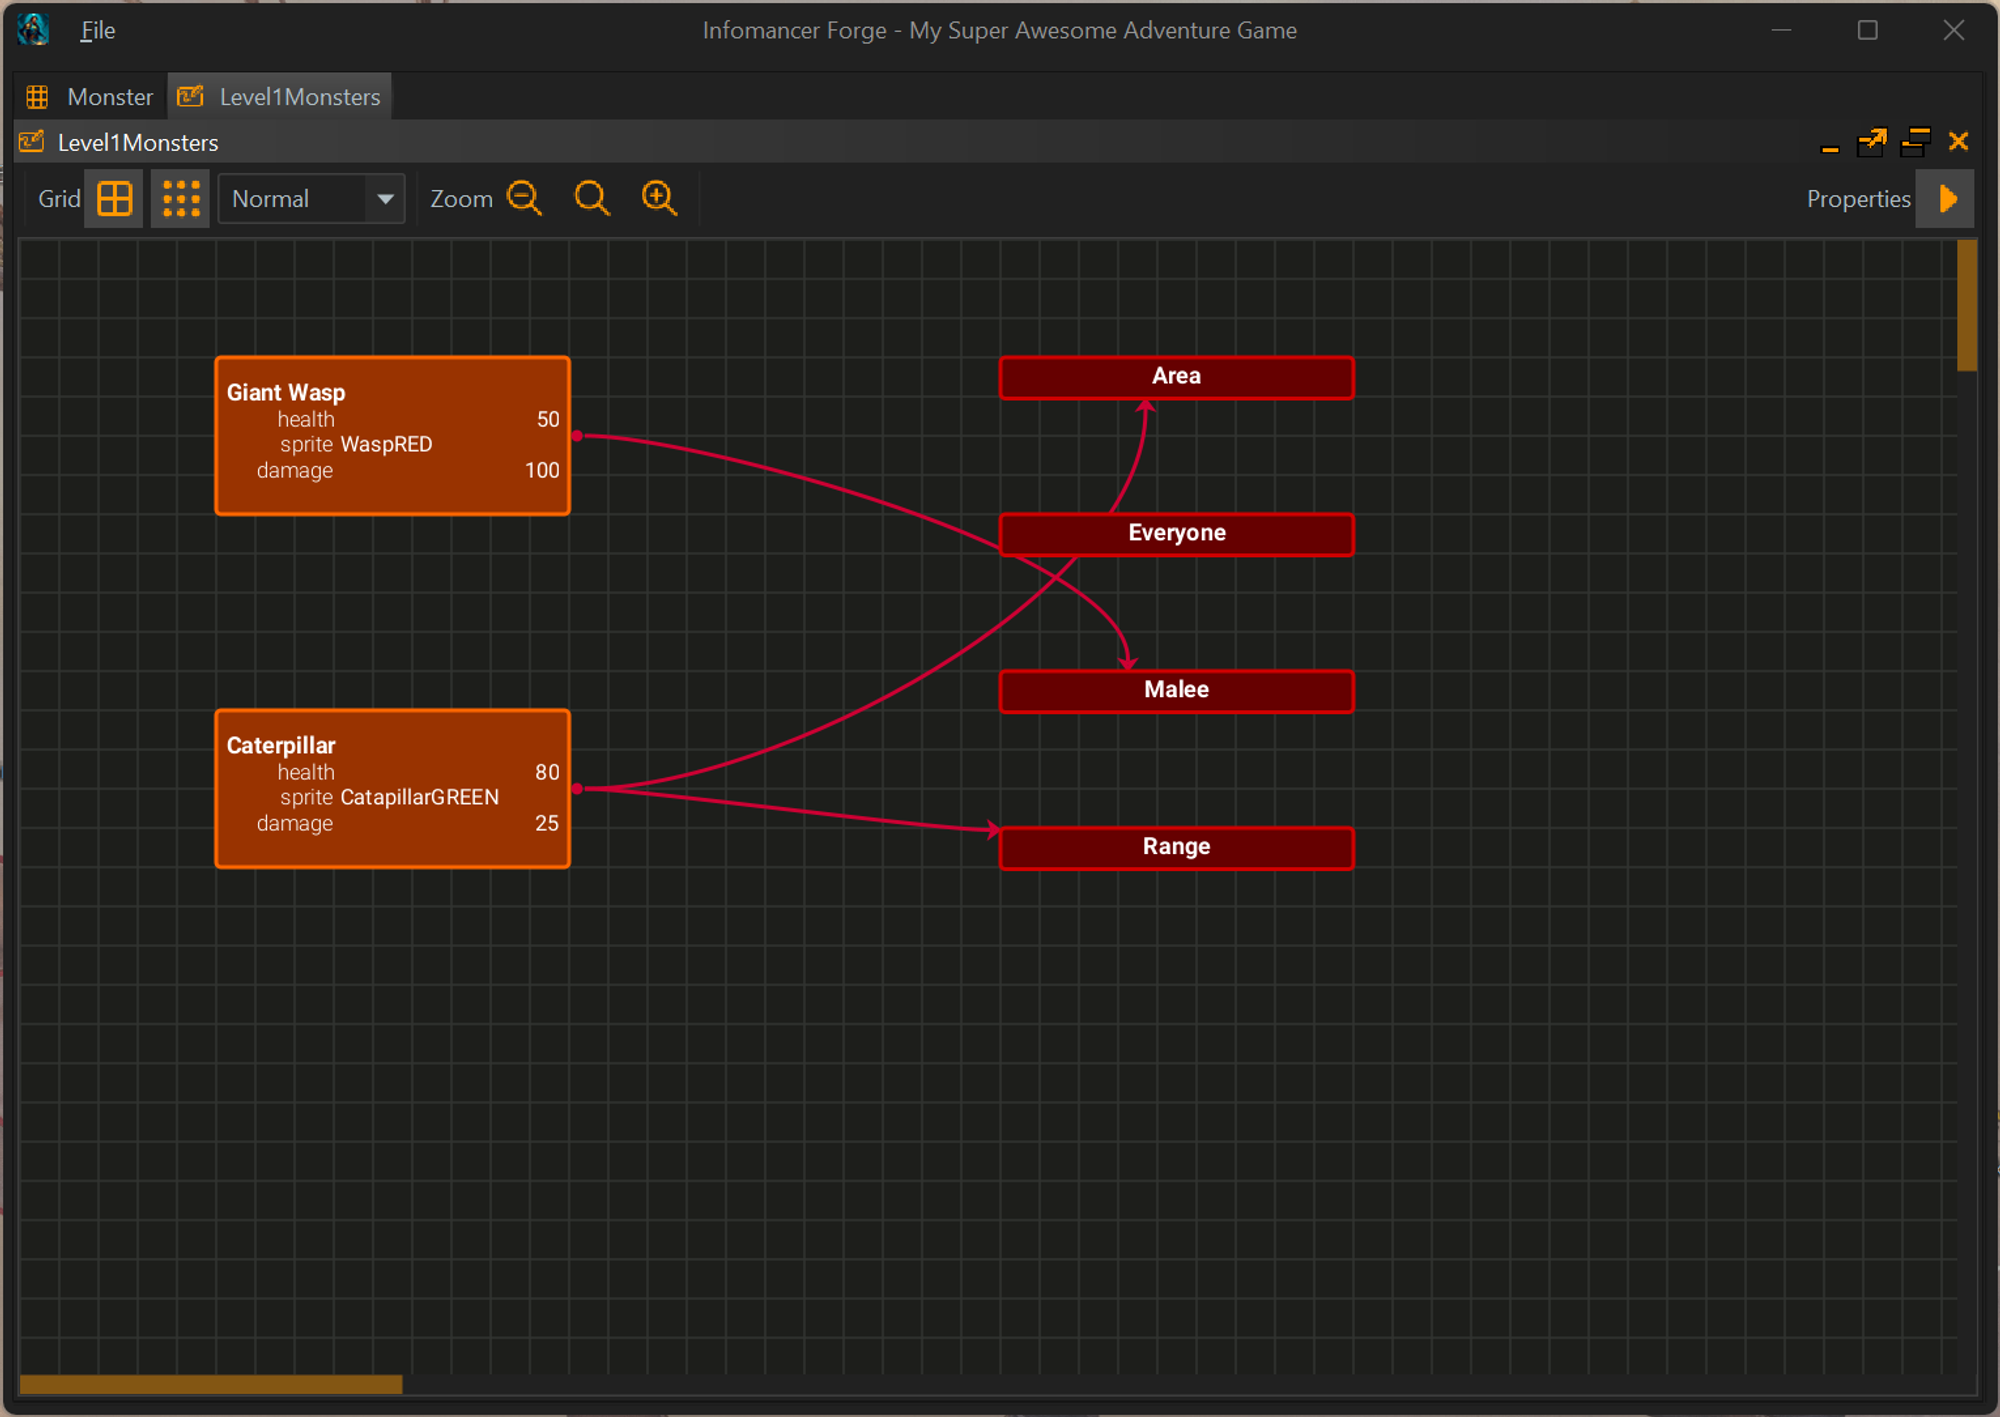
From here you could expand this in may ways.
Exporting your data
So you have all this data now what. Exporting is done via the plugin module. For now the manager is not available but we do allow you to import the plugin from the menu. Import Base plugins is the menu option to import the base that includes exporting.
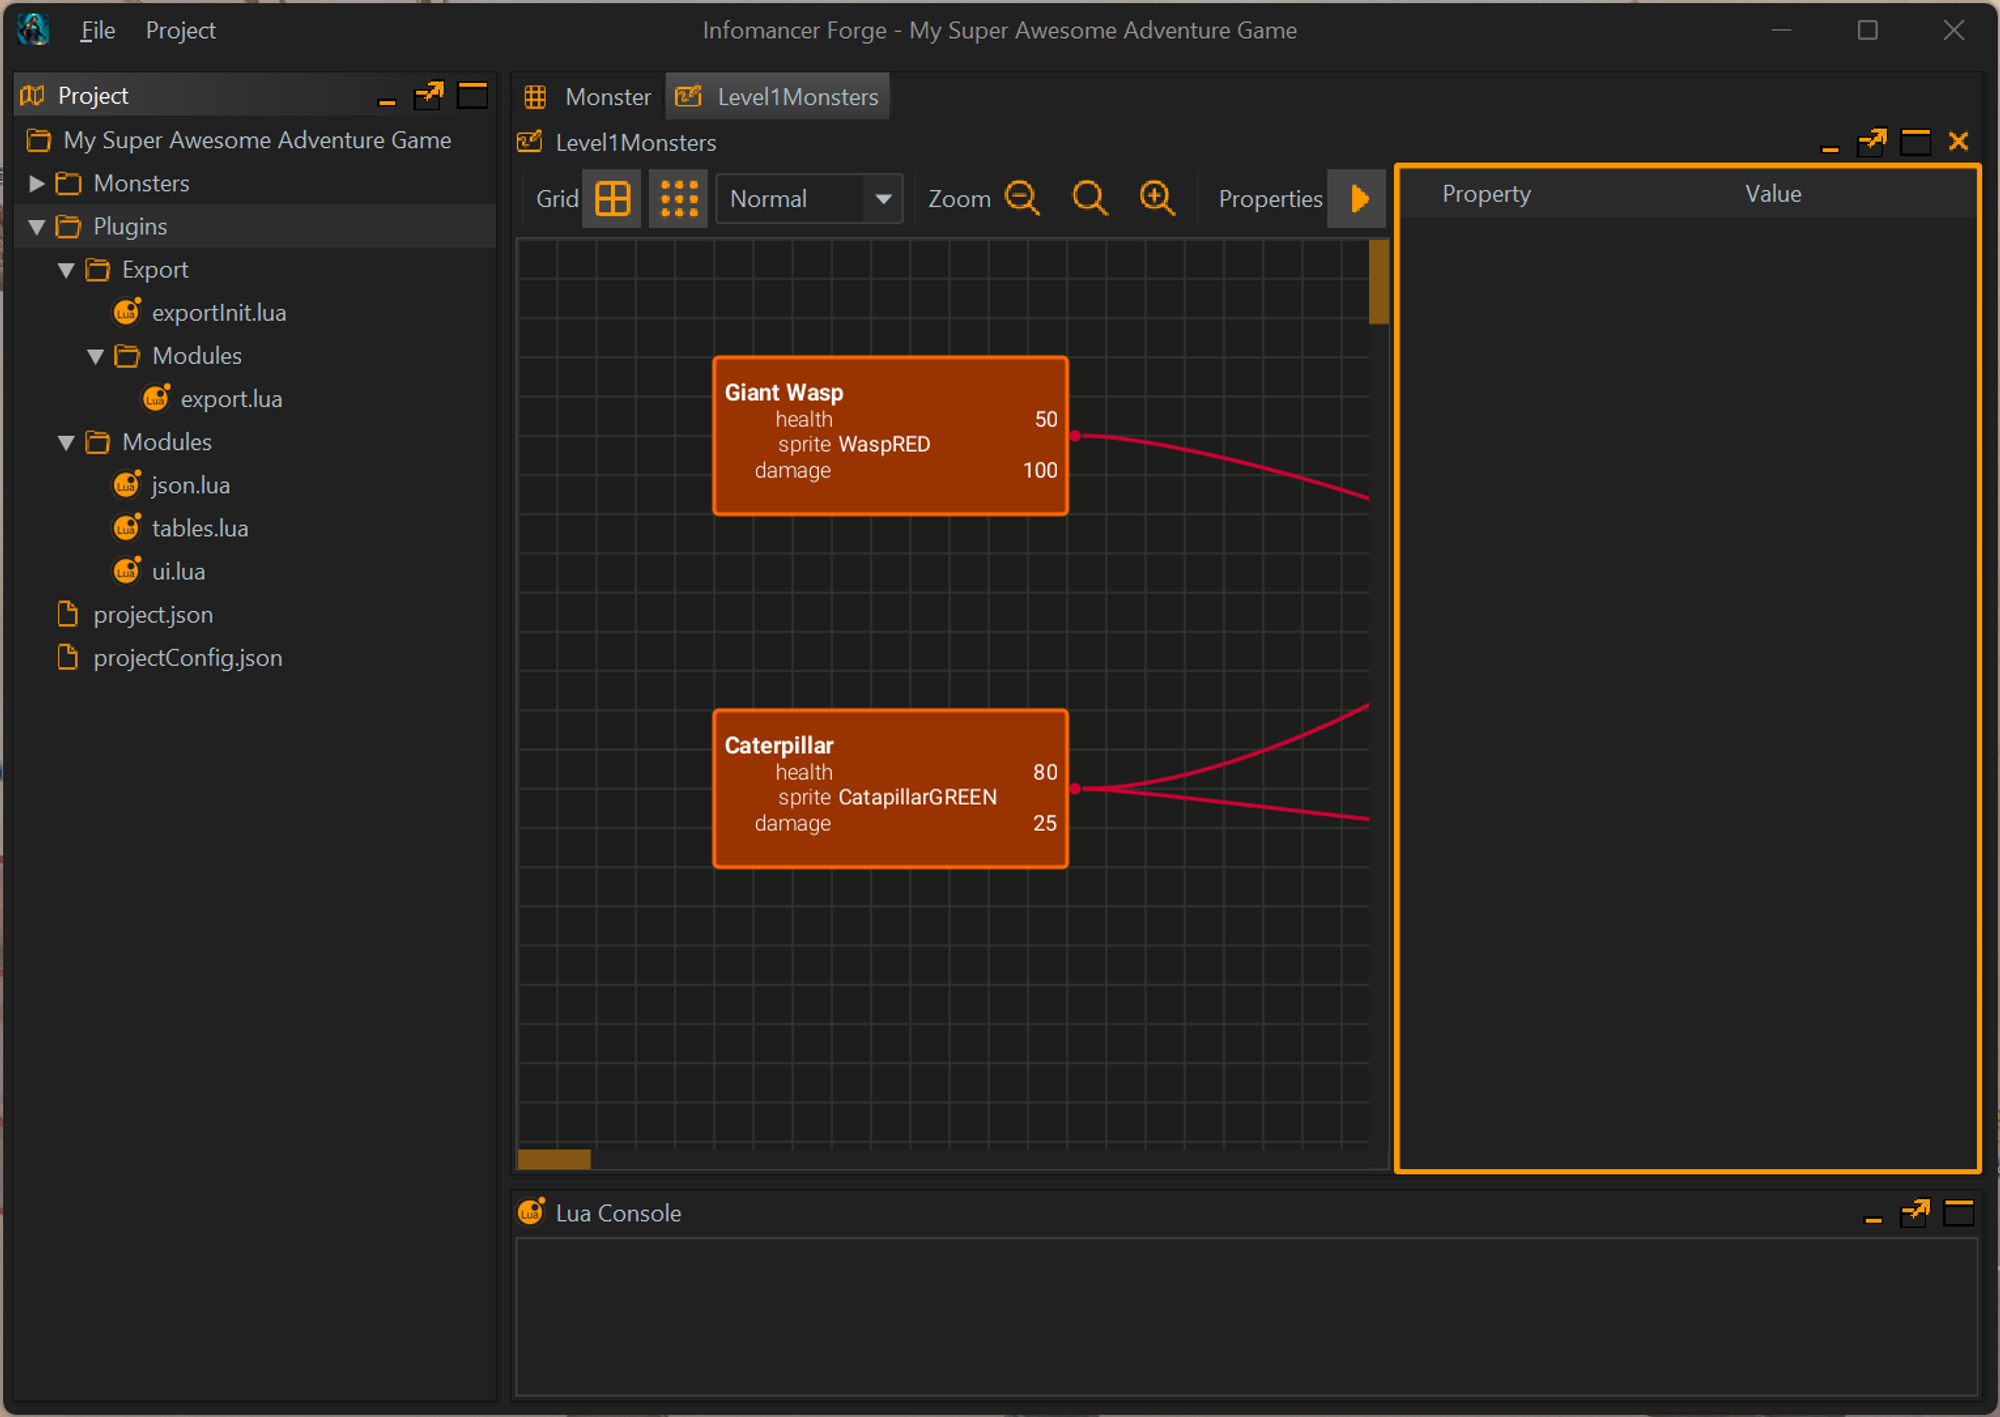
After you select install base your project will have a new folder called Plugins and in there a bunch of scripts. What is most important to note is the new menu option at the top “Project”
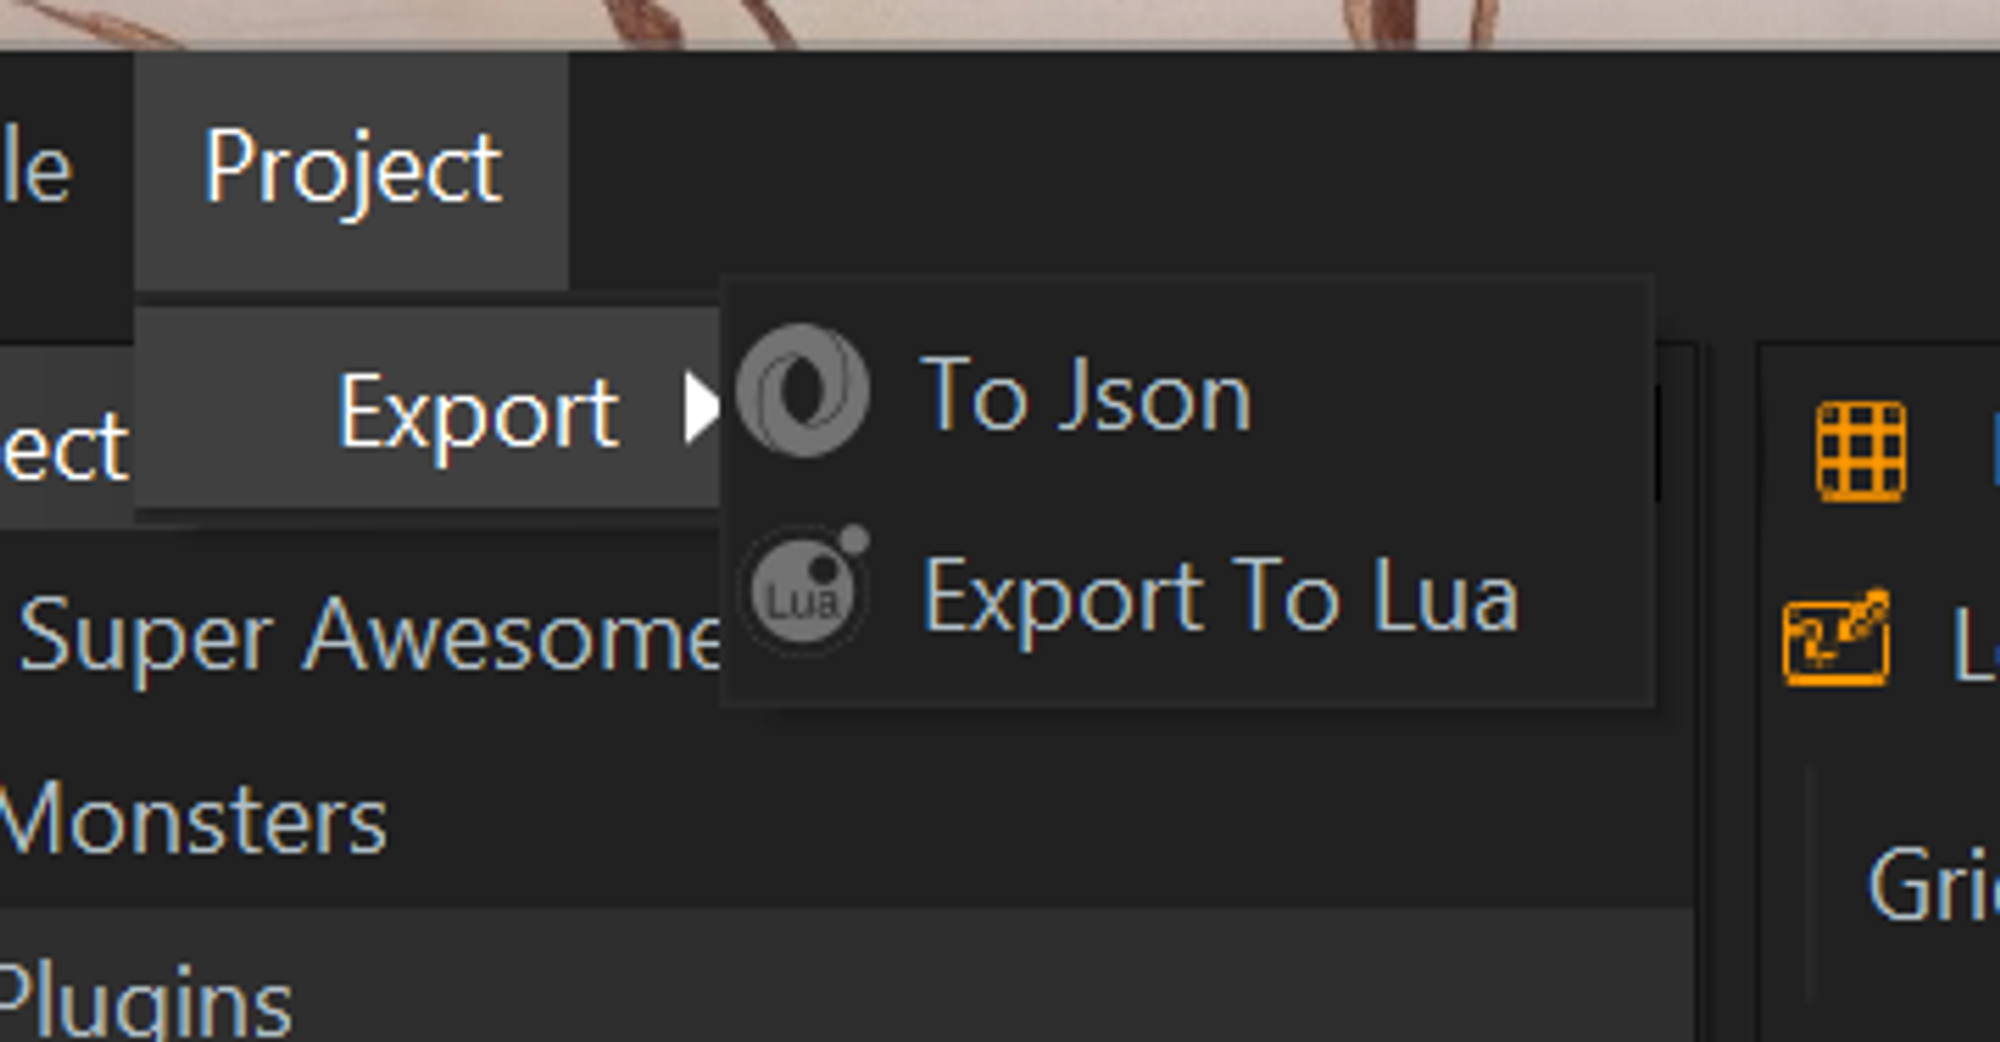
Currently you can export to JSON or to a Lua table. We expect most will find JSON most useful. We will export this project to JSON and show you the results here.
Output goes into a Build folder in your project root folder. Currently the project tree does not update to reflect this but the file will be on your drive called
./build/data.json{ "Monster": { "uuid": "8bc8707b-3fb2-423e-83f3-6050a5a2950b", "name": "Monster", "summary": "", "colorBackground": "#993300", "propertyDefinitions": [{ "name": "name", "required": true, "propertyType": "ID", "array": false, "gobFieldName": "ID" }, { "name": "health", "required": false, "propertyType": "Integer", "array": false, "gobFieldName": "WOYADCOJXK" }, { "name": "sprite", "required": false, "propertyType": "String", "array": false, "gobFieldName": "QLUHSVMLPN" }, { "name": "damage", "required": false, "propertyType": "Integer", "array": false, "gobFieldName": "DORUFQFNFC" }, { "name": "attackTypes", "required": false, "propertyType": "GOB", "array": true, "gobType": "baf54a95-8f2f-4de2-9762-62f7c6014ec3", "gobFieldName": "RRTQFDXBWV" } ], "data": [{ "sprite": "WaspRED", "attackTypes": ["Malee"], "name": "Giant Wasp", "health": 50 }, { "sprite": "CatapillarGREEN", "attackTypes": ["Area", "Range"], "name": "Caterpillar", "health": 80 } ], "gobType": "Base" }, "AttackType": { "uuid": "baf54a95-8f2f-4de2-9762-62f7c6014ec3", "name": "AttackType", "summary": "", "colorBackground": "#660000", "propertyDefinitions": [{ "name": "name", "required": true, "propertyType": "ID", "array": false, "gobFieldName": "ID" } ], "data": [{ "name": "Range" }, { "name": "Everyone" }, { "name": "Malee" }, { "name": "Area" } ], "gobType": "Base" } }
The current export exports everything. We will be adding more flexible configurations to it to make the export fit your project better. As you can see above the fields and the data are all included.
